• Skip to primary navigation
  • Skip to main content
  • Skip to footer

DIY REMEDIES

Radiant Wellness: Empowering Your Health and Beauty

  • Home
  • Recent Articles
  • Remedies A – Z
  • DIY Smoothies
  • Reviews
  • About Me
  • Contact Us

Remedies

Natural Ways to Get Rid of Corns on Feet

December 15, 2019 By Sruthika Leave a Comment

Are you using ill fitted shoes or spending a long time with those tight shoes or high heels? Then you are at a risk of developing corns on your feet.

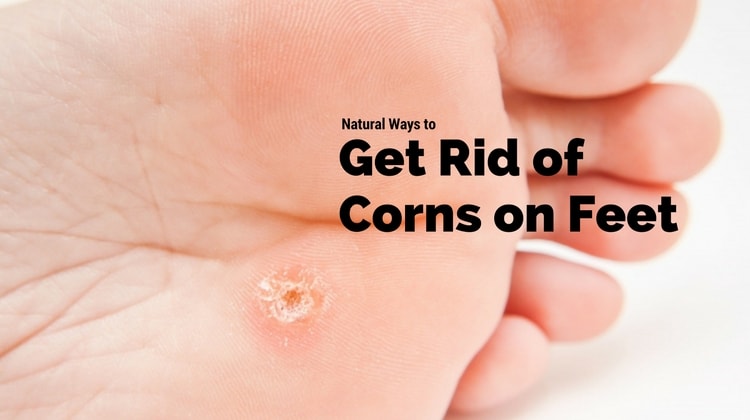
Corns occur as small circles with thick and hardened skin area that appears most commonly on the feet (on the tops or sides of the toes, between the toes and soles of the feet) which makes you walk uncomfortable.

The most common cause for these corns is the skin experiencing too much pressure and friction either due to ill fitted shoes, wearing high heels, hard soles, prolonged standing with tight shoes, walking barefoot, wearing shoes without socks, manual labor, playing sports that put pressure on your feet, etc.

People who are suffering from bunions, scars, diabetes, poor blood flow, damaged sweat glands, warts or hammertoes on their feet are more prone to suffer from corns than others.

Thick and rough skin, pain while pressing, hard raised bumps, experiencing discomfort while walking or standing are some of the symptoms of corn.

Eliminating the source of pressure or friction will definitely heal your corns. There are many natural home remedies that work well in treating your corns.

Home Remedies for Corns on Feet:

Here are the best natural remedies that help you in dealing with corns on your feet. Have a look at these remedies and follow them regularly till you cleared your problem.

Remedy – 1: (White Vinegar)

The acidic levels of white vinegar will soften the hard skin and balances your pH levels. It has antimicrobial and anti-inflammatory properties that reduce the risk of getting infection.

  • Add 1 part of white vinegar in 3 parts of water and stir well.
  • Dab this vinegar mix on the corn using a cotton ball at night before bedtime.
  • Cover it with an adhesive bandage and leave it on for overnight.
  • Remove the bandage in the morning and exfoliate the skin with an emery board or pumice stone.
  • Dry your feet and apply some natural moisturizers (like olive oil or coconut oil).
  • Continue doing the same process for once daily till the corn gets cleared from your feet.

Note:

  • Or soak a slice of stale bread in apple cider vinegar. Squeeze out and place it on the corn affected part of the foot. Secure it with a tape and leave for overnight.
  • Also, pour some white vinegar over white onion slices in a jar. Leave it to soak for a whole day and at night before bedtime, place those thick slices of onion on the corn and secure it with a bandage. Remove it the morning and gently rub with a pumice stone.

Remedy – 2: (Pumice Stone and Castor Oil)

Rubbing your feet with a pumice stone will help to remove dead and hardened skin, reduces the foot pain and speed up the healing process by stimulating proper blood circulation. Castor oil has amazing moisturizing, antimicrobial, antiseptic and anti-inflammatory properties that soothe your skin and relieves it from the pressure. This process can be done at night before bedtime.

  • Soak your feet in a comfortable hot water for about 10 – 15 minutes to soften the hard skin.
  • Rub the feet (focus on corns) gently using a pumice stone for 3 – 5 minutes and dry the feet.
  • Then apply castor oil on the corn and secure it with a tape.
  • Leave it on for overnight and remove the bandage in the next morning.
  • Apply castor oil for several times in the day and repeat the same for few days till you get relief from the problem.

Pumice Stone and Castor Oil Remedies for Corns on Feet

Remedy – 3: (Baking Soda)

Baking soda exfoliates the skin to remove dust and dead skin covering the corn to get relief from the problem. It also exhibits antimicrobial and antiseptic properties that help to keep your skin free from infections.

  • Pour 2 – 3 tablespoons of baking soda in a foot basin filled with warm water.
  • Soak your feet in this water for about 10 – 15 minutes.
  • Rub your affected feet with a pumice stone for few minutes to get rid of dead skin cells.
  • Do the same process for once daily till you get relief from the problem.

Note: Or mix some lemon juice and few drops of water in 1 teaspoon of baking soda till it forms a fine paste. Apply it on the affected area and cover it with a bandage. Leave for overnight and wash the area with lukewarm water and exfoliate to get complete relief.

Remedy – 4: (Garlic)

Garlic has natural antioxidant, antimicrobial and anti-inflammatory properties that prevent infection and corns from your feet.

  • Gently rub half of a garlic clove on the corn at night before bedtime and allow the skin to dry.
  • Cover the area with a band-aid and let it sit for overnight.
  • Remove the band-aid in the next morning and rinse the feet with lukewarm water.
  • Regular follow – up of this process will help you to get quick relief from corns on your feet.

Note:

  • Or make a paste by crushing 2 – 3 garlic cloves with a pinch of salt and spread this paste on your corn and cover it with a bandage. Leave for 3 days and then remove it.
  • Also, apply a paste prepared by crushing 2 – 3 garlic cloves with a little vinegar on the corn using a cotton ball. Secure it using a tape and wait for 2 – 3 hours and then remove the tape. Clean the area and repeat it.

Remedy – 5: (Licorice)

Licorice has estrogen-like substances which help to soften the layer of the hard skin that falls off the corns into the dead skin. It also contains many medicinal and healing properties that prevent the infection and promote faster healing.

  • Add enough mustard oil in 1 tablespoon of licorice powder and stir well to make it as a thick paste.
  • Apply this paste on the corns affected areas at night before bedtime.
  • Secure it with an adhesive bandage and leave it on for overnight.
  • Remove the bandage and rinse the area with lukewarm water in the next morning.
  • Repeat it on every night till the corn becomes soft and gets reduced in size.

Remedy – 6: (Turpentine Oil)

Turpentine oil has strong antibacterial and antiseptic properties that reduce the risk of getting soft corns into infectious. It can be penetrated deep into the skin and thus heals your corns at a faster rate.

  • Mix 1 tablespoon of turpentine oil and 2 tablespoons of camphor oil in 1/4 cup of melted virgin coconut oil and keep it aside till it forms a creamy texture.
  • Then soak your feet in warm water for few minutes to get soften the hard corns.
  • Dry your feet and apply this cream on the corns.
  • Repeat the same process 2 – 3 times daily (once at night before bedtime) till you’re corn comes out.

Note: Or wrap some ice in a thin cloth and use it to massage the corn affected area for 2 – 4 minutes. Dry the feet and apply turpentine oil on the corn. Leave it on for overnight by securing it with a bandage.

Remedy – 7: (Papaya)

Papaya has several enzymes that help to slough off hard and dead skin from your feet. It eases your pain and discomfort caused due to corns. It also dries up and falls off your corn easily and quickly.

  • Extract the juice from a freshly grated small piece of raw papaya.
  • Dip a cotton ball in this juice and dab it on the corn.
  • Cover it with a tape and leave it for few hours to overnight.
  • After that, gently exfoliate the skin using a pumice stone.
  • Continue doing the same process daily till you get satisfied results.

Note: Also, consume papaya or apply its paste on the corns to get relief from the problem.

Tips and Precautions:

  1. Also, use over the counter lotions and corn caps to get relief from corns. In case, you are experiencing corns frequently or painful, then consult your doctor for proper diagnose and treatment.
  2. Pineapple peel has enzymes that help to soften the corns and makes it fall easily. Place the inner part of the pineapple peel and cover it with a bandage. Leave for overnight and remove the bandage. Rinse the area and apply some coconut oil to get rid of the problem.
  3. Curcumin in turmeric helps to heal corns on the skin. Just mix turmeric powder with aloe vera gel or honey and apply this paste on the corns to make it fall down easily from the skin.
  4. Soaking your corn affected skin area in Epsom salt mixed warm water will give relief from the problem.
  5. Always apply natural moisturizing agents like olive oil, cocoa butter, almond oil or coconut oil to your dry corns to soften them and to get quick relief from the problem.
  6. Always wear comfortable and properly fitted shoes (with extra padding) or sandals. Don’t go barefoot to any place, use protective pads or coverings over the corns to reduce the pressure and friction on the skin.
  7. Never ever stand too long and also trim your nails (especially toenails) to prevent pressure on the fingers.
  8. Don’t cut or shave corns, as it will increase the risk of infection and the problem worse. Also, for faster relief, rinse your hands and feet with mild soap and water in every evening.

Try these remedies and share your experience with us in the comments box.

Filed Under: Feet Care, Remedies

How to Heal A Stiff Neck Naturally

December 15, 2019 By Sruthika Leave a Comment

Do you have any difficulty in moving your neck or feeling pain while turning your head? Then you might be suffering from a stiff neck.

Stiff neck is a most common complaint by many of us, which was caused due to improper sitting or sleeping posture, tension headache, arm or shoulder pain, staying in same posture for a prolonged period, too much exercise, carrying heavy loads which put more pressure on the shoulders, stress and anxiety, etc. which creates tension or injury to the neck nerves.

It is a painful problem which can lead to doctor’s appointment if you didn’t get relief from pain within a week or suffering from high fever.

Don’t panic, it is not a serious health problem but it disturbs our daily activities, including sleep. Rather than choosing over the counter medications or treatments, just give a trial to natural home remedies which are safe and give you long lasting results.

Home Remedies for Stiff Neck:

Here are the best natural ways which help you to relieve your stiff neck using simple home based ingredients. Let’s get started.

Neck Exercises:

Neck exercises will relieve the stress and tension caused by the strained, tight neck muscles which in turn help you to get rid of stiffness on your neck.

  • Sit straight with your relaxed body.
  • Nod your head forward (towards chest) and backward (towards upside). Repeat it for few times.
  • Then tilt your head towards right and left shoulders. Repeat it for few times.
  • Now without turning your body, slowly turn your neck towards your left side and right side. Repeat it for few times.
  • Finally, stop this exercise with a few gentle shoulder rolls.
  • Continue doing the same process few times daily till you get complete relief from the stiff neck.

Note:

  • Swimming is the best exercise for the people who are suffering from stiff neck, as it improves the overall strength of the neck and back.
  • Don’t perform any neck exercises if it hurts you too much.

Cold or Heat Compress:

A cold compress will numb the pain and limit your buildup of lactic acid (a byproduct of muscle metabolism that causes soreness) and thus soothes your stiff neck. Heat therapy will increase the blood flow which in turn reduces stiffness.

  • Wrap few ice cubes in a thin towel as a compress (or use a bag of frozen vegetables or peas).
  • Hold it against the affected neck area for about 10 – 15 minutes.
  • Repeat it for every 3 – 4 hours daily for 2 – 3 days.
  • If you didn’t get any relief from the stiff neck after 2 days application of cold compress, then try heat therapy.
  • Place a hot compress in the form of cloth soaked in hot water or heating pad or heat wrap or hot water bottle on your neck for at least 10 minutes.
  • Also, place your head below the shower and run warm to slightly hot water on your neck for about 5 minutes. Don’t move your neck while doing this process.
  • Continue applying this hot compress for 2 – 3 times daily to get relief from a stiff neck.

Massage:

Massage will definitely relax your sore and stiff neck muscles by increasing the proper blood circulation. Regular following will treat your stiff neck and enhance for better sleep.

  • Have a hot shower or bath to relax your muscles.
  • Warm some natural oil (like olive or coconut or mustard oil) slightly.
  • Then apply this warm oil on your stiff neck area and massage gently for few minutes using firm gentle strokes.
  • Wipe off the excess oil and leave it like that.
  • Continue doing this massage for twice daily till you get relief from your stiff neck.

How to Heal A Stiff Neck Naturally

Epsom Salt Soak:

Epsom salt has a chemical compound called magnesium sulfate which relaxes your muscles and relieves you from a stiff neck. It regulates the activity of various enzymes in the body and thus improves circulation to reduce the muscle stress and tension.

  • Pour 2 cups of Epsom salt to your bathtub which is filled with warm water.
  • Stir well and soak in this water with your neck area submerged for 15 – 20 minutes.
  • Finally, rinse your body with lukewarm water and dry your body.
  • Do the same process for thrice a week till you get relief from the problem.

Note: Avoid using this soaking process if you’re suffering from kidney problems or diabetes.

Apple Cider Vinegar:

Apple cider vinegar has essential enzymes, nutrients, amino acids, antioxidant and anti-inflammatory property that helps to treat your stiff neck. It is effective in providing relief from muscle strain and pain caused due to nutritional deficiency.

  • Soak a clean cotton ball in raw, organic and unfiltered apple cider vinegar for few seconds.
  • Place it on the affected neck area and leave it on for few minutes.
  • Take out the cotton ball and repeat the same process twice daily for few days till you feel better.

Note:

  • Or drink 1 teaspoon of apple cider vinegar mixed in 1 glass of lukewarm water to get rid of the problem.
  • Also, mix 2 cups of apple cider vinegar in your bathtub filled with lukewarm water. Soak in it for 15 – 20 minutes.

Peppermint Oil:

Menthol in peppermint oil helps a lot in soothing your stiff muscles of your neck. It also has an analgesic property that reduces your pain and other discomforts.

  • Slightly warm 2 teaspoons of olive oil for few seconds and add few drops of peppermint essential oil in it.
  • Stir well and apply it on your neck.
  • Massage your stiff neck gently for few minutes and then wipe off the excess oil.
  • Follow this remedy for twice daily till your stiff neck is cleared completely.

Note:

  • Or mix 3 – 5 drops of peppermint oil in a bowl of cold water. Soak a clean washcloth in water and place it on the affected neck for 10 – 15 minutes. Repeat it regularly.
  • Remember that peppermint oil is not suitable for people with sensitive skin or children.

Cayenne Pepper:

Capsaicin in cayenne pepper exhibits analgesic and anti-inflammatory properties that reduce the pain and stiffness.

  • Add 1 teaspoon of cayenne pepper powder in 2 tablespoons of warm olive oil.
  • Stir well to make a fine paste and apply it on the neck affected area.
  • Massage gently and cover it with a bandage.
  • Let it sit for a few hours and rinse off with water.
  • Regular follow – up of this process for few days will help you to cure stiff neck problem.

Note: Or include cayenne pepper in your cooking to get faster relief (or) apply the capsaicin-containing over the counter cream or lotions on the neck to relieve stiffness.

Turmeric:

Turmeric has curcumin that exhibits anti-inflammatory property and enhances proper blood circulation that relieves you from pain and other discomforts caused due to your stiff neck.

  • Add 1 teaspoon of turmeric powder in 1 cup of milk.
  • Stir well and heat it on a low flame for few minutes.
  • Let it cool for few minutes and drink it by adding a little honey.
  • Repeat it for twice daily for few days until you cleared your stiff neck problem.

Note: Make sure that people suffering from bile duct obstruction and gallstones should not use turmeric.

Tips and Precautions:

  1. Acupressure (especially Luo Zhen) is also used to get rid of a stiff neck. It is a pressure point that located in the depression between two bones near the knuckles of the middle and pointer fingers. Remember to apply pressure on the opposite hand (left side neck stiff – pressure on right hand).
  2. Go for the skin scraping technique to enhance the blood circulation into aching area and relieve your stiff neck.
  3. Never ever sleep on your stomach, always sleep on your side or back to prevent stiffness on your neck. Also, try to sleep without a pillow for few nights, if you’re suffering from severe stiffness of your neck.
  4. Get plenty of sleep for about 7 – 8 hours which in turn boost your immunity and helps your body to heal itself quickly.
  5. Stop placing any kind of strain on the neck muscles, as it may increase the pain and thus delays the healing process.
  6. For faster relief, try some relaxation techniques to combat stress which in turn relieves muscle tension and stiff neck.
  7. It’s best to take some breaks while at work and perform small neck exercises to reduce stress and strain on the neck.
  8. Always practice a good posture throughout the day while standing or sitting or sleeping to prevent stiff neck now and then.
  9. Performing heavy physical exercises or crimping your phone between your neck and shoulders or being overweight or have stress, etc. will result in a stiff neck.
  10. Drink plenty of water, use horseradish or celery leaves, consume fresh fruits and vegetables, etc. in your diet to get rid of a stiff neck.

Try these remedies to get relief from the stiff neck. Or did you find any remedy missed in this article? Then share it with us.

Filed Under: Health Remedies, Remedies

Common Mistakes to Prevent While Washing Your Face

December 15, 2019 By Sruthika Leave a Comment

A face wash is a most important aspect in any skin care regimen. It helps to remove dust, oil, dead cells and other impurities from your face and keep it fresh. So, don’t underestimate the face washing in your beauty routine. It is the first and foremost thing to be done for every beauty treatment.

Unfortunately, most of us are not doing it properly. Do you know that washing your face in a wrong manner can result in a lot of skin problems like irritation, acne, oiliness, dryness, premature sagging, breakouts, wrinkles and many?

Here we are going to know how to do face washing without doing any mistakes. So, incorporate this technique into your daily skin care regimen to have a flawless skin.

Let’s get started.

1. Over Washing:

Not washing your skin will result in bacteria or yeast buildup which leads to many skin problems. Washing your face at regular interval is a good idea but washing too often can definitely cause dryness, irritation, skin aging and promote oil production.

The best time to wash your face is twice daily, once in the morning after you wake up and once at night before bedtime. Though, if want to rinse your face between those times due to environmental pollutants, dust or oiliness, then use facial wipes (not frequently) for a quick cleanse instead of water.

Common Mistakes to Prevent While Washing Your Face

2. Remove Makeup:

Rinsing your face with a cleanser will help to remove makeup and other dust particles from the skin. For best results, remove your makeup before washing your face then your cleanser will work deep into the skin pores.

So, remove your makeup with your homemade makeup remover like coconut oil, whole milk, olive oil, etc. Also, give special attention to the eye make-up. Don’t sleep with your makeup on, as it damages your skin.

3. Rinse with Lukewarm Water:

Rinsing your face with hot water will dry out your skin. Cold water face washing can lead to skin irritation and thus breaks the capillaries.

So, it’s best to use either room temperature water or lukewarm water to keep your face healthy and glowing. Remember to wash your face with water that is suitable for drinking for best results.

4. Exfoliate Properly:

We all know that exfoliating will help to remove dirt, dead cells and excess oil from the skin. it is essential for healthy skin that encourages skin cell renewal, improves skin tone, enhances skin texture and keep your skin young and healthy.

Remember that either over-exfoliating or not exfoliating is considered as the big mistakes. Exfoliate for once or twice a week by using a gentle scrub. Exfoliate once a week at night before bedtime.

Try this homemade scrub by mixing equal parts of sugar and honey along with few drops of olive oil. Scrub your face gently and rinse off with lukewarm water after 5 minutes.

5. Don’t use Wrong Cleanser:

Choosing the right cleanser as per your skin type is the best way to protect your skin without harming it. Using a mild, non – soap cleanser will remove make-up, dirt, and grime without stripping your skin’s moisture and natural oils.

6. Rinse Thoroughly:

Using a good cleanser without proper rinsing on your face will be a waste of time and money. It can also be harmful to your skin, as it clogs the pores, dry out your skin and attract more dirt.

So, rinse your face thoroughly after cleansing, especially along the neck, hairline, sides of your nose and ears till the cleanser removed from the skin.

7. Avoid Rubbing with Towel:

Avoid rubbing your face vigorously using a towel after washing, as the constant abrasion and friction can strip the natural oils of your skin. This results in dryness and irritation along skin sagging (due to pulling and tugging of the skin).

Also, avoid using the same bath towel used to dry your body for drying your face. Instead of using towel, try a soft washcloth or tissue to pat dry your skin.

8. Use a Fresh Clean Washcloth:

Using a washcloth, again and again, will redeposit the dirt and impurities back into the skin rather than removing it. So, always prefer a fresh, clean washcloth for your face to prevent skin problems like acne breakouts, blemishes.

Remember to wash the used washcloth thoroughly before re-using it. Don’t share your washcloth with other as it also increases the risk of getting skin problems.

9. Wash your Face with Clean Hands:

First and foremost thing in face washing is to wash your hands first and then go with the face wash to enjoy healthy and flawless skin. Washing with your dirty hands might transfer the dust and impurities into your face.

10. Moisturize Immediately:

Most of us will not apply moisturizer immediately after washing your face. Cleansing and exfoliating will remove the skin’s natural moisture, so it is important to apply a good moisturizer on your face every time when you wash your skin to retain its natural moisture with maximum absorption and to seal the moisture.

Applying moisture not only prevents dryness and irritation but also acts as a protective barrier to prevent dust and impurities getting into your face.

Along with these things, its must to drink plenty of water to detoxify your body and also your face, as internal problems like hormonal imbalance, gut issues may also result in damaging your face.

Follow these tips while washing your face to get rid of many skin problems and to get young and flawless skin.

Filed Under: Beauty, Remedies

10 Best Habits to Protect your Kidneys from Damage

December 15, 2019 By Sruthika Leave a Comment

Habits to Protect your Kidneys from Damage

Kidneys – An important organ used to detoxify the blood, removes excess water and filters out the waste through urine. They are located at the back of upper abdominal cavity just below the rib cage, on each side of the spine.

They regulate the minerals levels and produce certain hormones essential for body functions. Hence it’s important to keep your kidneys healthy to function properly.

Some symptoms like dizziness, change in color and quantity of urine, anemia, tiredness or fatigue, vomiting, breathing issues, itchy skin, sudden pain in the body, etc. might indicate that you’re suffering from kidney problems.

Don’t panic, we can maintain healthy kidneys by including certain habits to our lifestyle. But if you’re suffering from any of the above symptoms from past few day or getting any pain on the place where kidneys located, then consult your doctor for proper diagnose and treatment as per your health issue.

The habits which mentioned here will help to enhance your kidney’s health and prevents its further damage. Let’s have a look at what are the common habits that damage the kidneys and how to get rid of it.

1. Empty the Bladder Timely:

We all have a habit of delaying the urge to urinate while we are doing some work or in some place where you’re unable to urinate. But maintaining this full bladder for a long time will cause damage to your kidneys.

Empty the Bladder Timely to Protect your Kidneys

The urine that remains for a long time in the bladder will enhance the growth of harmful bacteria which can cause kidney infections or urinary tract infection. Also, a full bladder will increase the pressure on the kidneys which in turn results in renal failure. So, respond to the call of nature and stay healthy.

2. Intake of Sufficient Water:

Drinking plenty of water will help the kidneys to flush out the toxins easily from the body, or else they damage your kidneys. Staying hydrated will increase the blood flow to the kidneys and thereby it eliminates toxins from the body.

So, drink at least 10 – 12 glasses of fluid daily to maintain healthy kidneys and hydrated body. But remember that drinking too much of water will put a slight load on kidney’s function.

3. Limit your Protein Diet:

We all are aware that proteins are good and essential for your health but excessive intake of protein-based foods like red meat will raise the risk of getting kidney problems.

Kidneys metabolize the diet and expel nitrogen as the byproduct from protein foods. But high protein diet will raise the metabolic load and thereby increase glomerular pressure and hyperfiltration which in turn causes kidney problems. So, limit your protein intake for the overall health of the body, including kidneys.

4. Reduce Salt Consumption:

Whenever you consume salt in high quantities, then the kidneys need to work more to excrete the excess salt and thereby less working on its functionality. This might cause water retention in the body and increases blood pressure and thus risk of getting kidney disease.

So, consume salt for not more than 5 grams a day (about 1 teaspoon) to prevent damage to your kidneys and other health problems.

5. Quit Smoking:

Smoking is injurious to health, we all know this thing. Smoking damages each and every organ of the body (including kidneys). It increases blood pressure and heart rate which in turn reduces the blood flow and narrows the blood vessels in the kidneys.

So, quit smoking and the use of tobacco products will disrupt the kidney functioning and increase the risk of getting kidney diseases. Take some suggestions from your family doctors or professionals to eliminate this habit and stay healthy.

6. Reduce the Use of Analgesics:

Most of us are having the habit of taking over the counter pain relievers (analgesics) to get rid of pain, inflammation, and fever but do you know that they damage different organs (including kidneys) in your body?

It is proved in research that analgesics reduce your blood flow to the kidneys and disturb the functioning of your kidneys. So, avoid taking painkillers without consulting your doctor and have it, if it’s necessary. Or else the long term usage will cause acute renal failure or chronic kidney problems.

7. Avoid Excessive Alcohol Intake:

Drinking alcohol will not damage your liver but also cause certain damage to the kidneys why because this toxic substance puts a lot of stress on these organs. Excessive intake of alcohol will cause uric acid deposits in renal tubules which lead to tubular obstruction and kidney failure.

Alcohol causes dehydration which is another defect that disrupts the kidney’s functionality. If you don’t have this habit then it’s good for health but if you have then drink it in moderation.

8. Get Enough of Sleep:

A sound sleep of about 7 – 8 hours daily is essential for overall health but due to our busy lifestyles, we are not getting that enough sleep. Do you know that renewal of organ tissues occurs at night while you sleep?

If you don’t get enough sleep then there will be an interruption in the renewal process which in turn damages not only kidneys but all other organs. Studies have suggested that sleepless nights raise the blood pressure levels and clog the arteries.

So, have some healthy sleeping habits and also maintain a good balance between rest and work for a healthy life.

9. Cut Down your Caffeine Content:

Intake of too much caffeine content will cause high blood pressure which in turn puts pressure on your kidneys. Regular over usage of caffeine will damage your kidneys and a little to your heart.

Caffeine increases the calcium excretion in urine and also cause kidney stone problem. So, drink 2 cups of coffee and 3 cups of tea per day. It’s recommended to limit your intake of other caffeine sources such as energy drinks, cocoa, chocolate, soft drinks, certain medications (made from caffeine extract), etc. to get rid of kidney problems.

10. Don’t Ignore Common Infections:

Ignoring certain infections like flu, cough, tonsillitis, cold, pharyngitis, etc. might be some symptoms of kidney damage. People suffering from kidney disease become more sensitive to weather changes and gets sick too often.

Hence avoid ignoring the infections caused due to bacteria or virus, as it damages your kidneys if not treated on time. So, when you’re suffering from these common infections, get treatment properly and quickly by consulting your doctor. Rest your body till you feel better.

Consider these things as a part of your lifestyle habits to maintain healthy kidneys and thereby healthy body.

Filed Under: Kidneys, Remedies

DIY Electrolyte Energy Drink Recipes

December 15, 2019 By Sruthika Leave a Comment

DIY Electrolyte Energy Drink Recipes

DIY Electrolyte Energy Drink Recipes

Do you know that electrolytes are basically salts? Our body contains potassium, sodium, bicarbonate, phosphate, magnesium, calcium, sulfate and chloride as major electrolytes. They are essential for regulating the functioning of the nerves and muscles.

In general, the body’s cells use these electrolytes to maintain voltage and carry the electrical impulses across the cell membranes to other cells. Whenever there is a loss of electrolytes in the body then you suffer from diarrhea, heavy sweating, fatigue, certain health problems, and illness.

So, to maintain a proper balance of these electrolytes and thereby for the proper functioning of the body, we need an electrolyte drink. However, there are many commercial drinks in the market, which may contain sweeteners and other preservatives that might harm your health rather than boost it.

Do you know that we can prepare our own electrolyte energy drink at home? Surprising!  Isn’t it? Yes, we can prepare this energy drinks at home with simple ingredients.

DIY Homemade Electrolyte Energy Drinks:

Always remember that anything made at home will always make you healthy and refreshed. Here are the ingredients that help you to prepare an energy booster at home.

Drink – 1: (Ginger Electrolyte Drink)

Ginger helps to soothe your stomach and aids in proper digestion along with treating intestinal disorders. It has anti-nausea, antimicrobial and anti-inflammatory properties that help to clear the microbes causing infections and when ginger mixed with sea salt, it acts as a powerful concoction to make you feel rejuvenated.

Salt helps a lot to replenish the sodium levels to reduce you’re sweating and thus helps to maintain the cell voltage in the body. It also helps to balance the stress hormone which in turn helps to reduce adrenaline fatigue.

Honey is a natural sweetener that enriched with enzymes and essential minerals to help the body absorb the richness of salt components. It not only enhances the taste but also helps to heal soothing sore throats, cold and cough.

Lemons are rich in vitamin C, calcium, potassium and citric acid that help to boost the immune system by replenishing the lost electrolytes in the body. It also enhances the energy boosters during a workout and thus speeds up the recovery of your lost electrolytes.

Here is the recipe…

  • Pour 1 cup of water in a pan and heat it.
  • Then add 3 – 5 ginger slices to it and boil it for 5 – 7 minutes.
  • Steep it for a couple of minutes and strain the water.
  • Then add 1 tablespoon of fresh lemon juice, 1/4 teaspoon of unrefined salt and 1 – 2 tablespoons of raw honey to it.
  • Stir all these ingredients well and enjoy this sweet, salt and sour flavored energy drink to balance your electrolytes.
  • Repeat the intake of this drink regularly during or after your workout session to make a refreshing start of the day.

Note: Or replace ginger with orange juice. Pour 1/2 cup of fresh orange juice, 1/4 cup of fresh lemon juice, 2 – 4 tablespoons of raw honey and 2 cups of water in a jar. Then add 1/4 teaspoon of unrefined salt and stir all these ingredients to enjoy the refreshing energy drink to boost up your energy and mood.

Drink – 2: (Coconut Water with Green Tea)

Plain water alone doesn’t contain any electrolytes and minerals to replace that lost during exercise. So, drinking electrolyte will help to rehydrate and replace the lost minerals.

Coconut water contains potassium and other natural sources of sodium that helps to replace the lost minerals and keep you hydrated in this summer.

Here is the recipe…

  • Mix 1/8 – 1/4 teaspoon of high-quality sea salt and 1 teaspoon of calcium magnesium powder in 1 quart of coconut water.
  • Then add 1/4 cup of lemon juice (or use apple, pineapple, grape juice) and 1 – 2 tablespoons of honey (or use stevia) to it.
  • Stir all the ingredients well and cool it by refrigerating it, as it lasts for 3 – 4 days.
  • Drink it after your workout or whenever you feel fatigue to rejuvenate and energize your body.

Note:

  • Or you can also use plain water, brewed green or herbal teas instead of coconut water for preparing this energy drinks.
  • Also, pour 1 cup of strawberries, 1/8 teaspoon of sea salt, 1 cup of ice, 3 cups of coconut water, 2 tablespoons of natural sweetener and 1 cup of water in a blender. Blend all these ingredients well and enjoy your natural electrolyte drink.
  • Or simply pour pieces of 1/2 a cucumber, juice of 2 limes and 1 ½ cups of coconut water in a blender. Blend all these by adding some ice and drink this electrolyte refresher regularly.
  • Also, mix 1/4 of a watermelon, a pinch of Himalayan sea salt and 2 large glasses of coconut water in a blender. Blend them and consume this electrolyte booster to get rid of the problem.

Drink – 3: (Cranberry Sports Drink)

Cranberry rejuvenates the depleted electrolytes and also helps to cleanse your kidneys and bladder along with detoxifying the lymphatic system. If it is blended with star anise then it makes the drink palatable for people with low levels of electrolyte.

Here is the recipe…

  • Mix 1/2 teaspoon of sea salt, 1 star anise, 2 tablespoons of maple syrup (or honey) and 3 cups of unsweetened cranberry juice in 5 cups of water.
  • Stir all these ingredients and let it sit for 30 – 45 minutes aside.
  • Strain the mix and refrigerate it.
  • Drink this electrolyte sports drink to rejuvenate yourself and make you feel refreshed.

Drink – 4: (Chia Seeds)

Chia seeds are loaded with omega – 3, potassium, calcium, fiber, proteins and have antioxidants that help to restore the essential electrolyte and make you stay hydrated and refreshed.

Here is the recipe…

  • Warm 1 cup of water and pour in a cup filled with 3 tablespoons of chia seeds.
  • Stir well and keep it aside till the seeds starting to swell.
  • Then cover it and refrigerate them for overnight.
  • Take out in the next day to check whether the seeds are blown up in size and the water becomes a thick gel.
  • Now mix this chia seed gel to 1 glass of your favorite juice and drink it by stirring well.

Note: Or simply mix this soaked chia seeds in 1 glass of coconut water to make it as your power booster electrolyte.

Tips and Precautions:

  • Prefer to use sea salt or real salt instead of table salt and also pure water for preparing these electrolyte drinks.
  • Also, you can replace water with an herbal tea infusion like peppermint or spearmint for proper digestion and also hydrates the body.
  • Choose honey instead of sugar as your natural sweetener. Also, prefer mashed mango (mango pulp) or slices of certain natural sweet fruits to get a natural sweetener.
  • Or you can simply mix 1/4 cup each of fresh lemon juice and lime juice, 1/8 teaspoon of sea salt, 2 tablespoon of honey and 1 – 2 cups of water. Stir well and drink this electrolyte energy drinks to stay hydrated along with replacing the lost electrolytes.
  • Drink plenty of water along with these electrolyte drinks to stay hydrated and to flush out the toxins from the body.
  • Avoid the intake of caffeine and carbonated drinks, as they result in dehydration and makes you feel thirsty.
  • Summer is the best season to enjoy these electrolyte drinks (for normal people but not for sports people), as we easily lose these electrolytes due to the high intensity of sun’s harmful UV rays.

Have you made your own electrolyte drink? What’s your favorite drink? Share your experience with us in the below comments box.

Filed Under: Drinks, Health Remedies, Recipes, Remedies

Best Essential Oils to Stop Hair Thinning and Hair Fall

December 14, 2019 By Sruthika Leave a Comment

How to Stop Hair from Thinning using Essential Oils

How to Stop Hair from Thinning using Essential Oils

The shiny, healthy and beautiful hair is a desire to everyone (both man and woman) but there are many internal and external factors that cause hair to become thin and make you look unattractive.

Stress, hormonal imbalance, genetics, allergies, excessive usage of harsh chemical based hair care products (toxic exposure), nutritional deficiencies, thyroid, poor hair hygiene, certain hair and scalp problems, etc. will thin your hair and thus results in hair loss (alopecia).

However, there are some natural hair growth remedies that help to thick the hair but the usage of certain essential oils will help you a lot in gaining the voluminous hair by stopping the hair loss.

In a study, it is stated that massaging the hair with essential oil (mixed with base oil) regularly will promote hair growth consistently by reducing the hair fall. So, in this article, we will learn about essential oils to stop hair thinning and stimulate hair growth.

How to Stop Hair from Thinning using Essential Oils:

Here are some best essential oils that treat hair thinning and promote the growth of new hair for healthy and voluminous hair.

1. Rosemary Essential Oil:

Rosemary essential oil has antimicrobial, antioxidant, antiseptic and anti-inflammatory properties that help a lot in promoting a healthy scalp and thereby hair growth. It also slows the hair graying along with treating dandruff, itchy scalp and other scalp problems.

It improves proper blood circulation and thus stimulates hair growth. As it is an essential oil, you have to mix it with carrier oils (such as almond oil, castor oil or olive oil).

Steps to be followed…

  • Add 12 drops of rosemary oil in 2 tablespoons of warm olive oil.
  • Stir well and apply this rosemary stimulant all over the scalp with your clean fingers.
  • Massage for few minutes to trap heat and cover your hair with a shower cap.
  • Wait for 45 minutes to few hours and then rinse your hair thoroughly with water and shampoo.
  • Repeat the same process regularly to prevent hair thinning and to enjoy healthy hair.

How to use Rosemary Oil for Hair Growth

Check out How Rosemary Oil Stimulates Hair Growth

2. Lavender Essential Oil:

The strong antiseptic property of lavender oil will help to get rid of germs clogging the hair follicles and causing infection and thereby hair fall. It also helps to improve the blood circulation to the scalp for the healthy hair growth. This oil is used as an ingredient in many hair care products.

Steps to be followed…

  • Mix 4 – 6 drops of lavender oil and 2 – 3 drops of cedarwood essential oil in 2 tablespoons of warm sesame oil.
  • Stir well and use this oil to massage the scalp thoroughly.
  • Cover your hair with a warm towel to trap the heat.
  • Leave it on for overnight and rinse off your hair with shampoo and warm water.
  • Do this overnight scalp treatment regularly to enjoy healthy, shiny and voluminous hair.

3. Cedar Wood Essential Oil:

Cedarwood protects the scalp with its antifungal and anti-inflammatory properties that treat fungal infections which inhibit the hair growth and also promotes hair growth. Poor blood circulation will weaken the hair follicles and leads to hair fall, the usage of this essential oil will stimulate the blood circulation and aids in healthy hair growth.

Steps to be followed…

  • Add 6 – 7 drops of cedarwood essential oil in 2 tablespoons of coconut oil.
  • Stir well and apply this oil mix onto the scalp.
  • Massage gently in circular motions and wear a shower cap.
  • Wait for at least an hour or overnight and after that, rinse off your hair thoroughly using a mild shampoo and lukewarm water.
  • Regular follow – up of this scalp massage will definitely help you to get rid of the hair fall.

Tip: The usage of cedar wood oil will promote a sound sleep and thereby relieves your stress and strain.

4. Sweet Basil Essential Oil:

Basil oil contains antioxidants, anti-inflammatory, and other essential nutrients which promote hair growth. It also keeps the scalp nourished with proper nutrient rich blood circulation to the scalp. It unclogs the blocked hair follicles and clears the oily scalp and dandruff.

Caution – It is suggested to use only recommended quantity of basil oil why because it is extremely strong and can lead to dangerous and toxic, if not used in the right way.

Steps to be followed…

  • Mix 3 drops of basil oil in 1 tablespoon of jojoba oil and stir well.
  • Apply it on the scalp with your hands and massage gently for few minutes to cover the entire scalp.
  • Let the oil sit for at least 30 minutes and then rinse the hair properly with shampoo.
  • Wrap the hair with a non-fluffy towel to prevent hair breakage and to enhance hair growth.
  • Continue the same process regularly to have thick hair.

Note: Also, for best results, leave the oil on the scalp for overnight and rinse it off in the morning.

5. Thyme Essential Oil:

Thyme essential oil will ward off the fungus, bacteria and other germs which are accumulated on the scalp and causing scalp infections and thereby hair loss with its effective antifungal, antimicrobial and antiseptic properties. It improves blood circulation and promotes the growth of new hair to prevent thin hair.

Steps to be followed…

  • Stir 6 – 7 drops of thyme essential oil in 2 tablespoons of grapeseed oil.
  • Apply it on all over the scalp and leave it on for about 30 – 45 minutes.
  • Finally, rinse off your hair with mild shampoo and water.
  • If your hair feels oily then shampoo it twice and dry it thoroughly.
  • Regular usage of this thyme oil will help you in preventing the hair thinning.

Note: Or stir 2 drops of thyme essential oil in 1 tablespoon of coconut oil and apply it on the scalp. Leave for 30 minutes and rinse off your hair with water to thicken your hair.

Best Recipes of Essential Oils for Healthy Hair Growth:

Here is an amazing combination of essential oils for treating thin hair. Have a look at these methods and follow them to prevent hair thinning and hair fall problems.

Method – 1: (Scalp Massage Essential Oil)

  • Take a jar and pour 1 ½ ounces each of grapeseed oil and jojoba oil as a base oil.
  • Then add 30 drops each of pure rosemary oil, sage oil and cedarwood essential oil in it.
  • Combine all these oil mixes by placing the lid securely and shake well.
  • Apply it on the scalp and hair (wet or dry) and massage thoroughly.
  • Let it sit for at least 20 minutes or apply it at night before bedtime and let it sit for overnight.
  • Cover your hair with a towel or shower cap to prevent oil strain on the bed linens.
  • After that, rinse your hair with mild shampoo and lukewarm water.
  • Repeat the same process for once a day (for severe hair fall) or thrice a week to stop hair thinning and to stimulate hair growth.

Note: Or mix 2 drops each of thyme oil, rosemary, lavender and cedarwood oil and 1/2 teaspoon of jojoba oil in 3 – 5 teaspoons of grapeseed oil. Apply it on the scalp and Wrap your hair with a towel. Leave for overnight and rinse off in the morning. Do it twice a week.

Method – 2: (DIY Essential Oils Shampoo)

  • Mix 1/2 cup of liquid castile soap and 1/4 cup of water in a glass jar.
  • Stir well and add 4 teaspoons of coconut oil in it.
  • Then pour this mix into an 8 oz glass bottle and add 14 drops of jojoba oil, 4 drops of rosemary oil and 10 drops of lavender essential oil in it.
  • Stir well by adding another 1/4 cup of filtered water in it.
  • Shake it well before every usage as a hair growth shampoo.

Method – 3: (Essential Oils Hair Rinse)

  • Add 3 drops each of rosemary oil, West Indian bay oil and lavender oil and 1 tablespoon of raw apple cider vinegar in 3 ½ oz of rose (or lavender or geranium flower water).
  • Stir well and mix 3 teaspoons of this hair rinse mix in 2 cups of warm water.
  • Pour this water over the hair to rinse it well and repeat it once again.
  • Finally, rinse the hair with plain water and do this hair rinse regularly for best results.

Note: Or simply mix 50 drops of any essential oils in 1/2 cup of organic apple cider vinegar and pour it in a 4 oz glass bottle for storage. While using, mix 3 teaspoons of this mix in 2 cups of warm water and use it to rinse your hair.

Tips:

  1. Regularly rinse your hair by using a mild (or natural) shampoo and lukewarm water.
  2. Drink plenty of water and consume a healthy and well-balanced diet (like fish, nuts, eggs).
  3. Get enough sleep, as good night sleep will help you to shred all the impurities, reduce your stress and thereby enhance hair growth.
  4. Regular application of homemade natural hair oils will help the hair to grow effectively.
  5. Avoid usage of the chemical based hair products and hair styling products or tools.
  6. Nourish your hair with regular homemade hair masks and take your shower with chlorine free water.
  7. It’s best to work out for at least thrice a week and do yoga (or meditation) to reduce your stress levels.
  8. Consult your doctor if you’re suffering from any hair or scalp problems for proper diagnose and treatment.
  9. The essential oils are very strong and powerful that may cause irritation and itching on the skin, if not used in the right way.
  10. Never ever use essential oils neat or directly on the skin. So, dilute it with any carrier oil like coconut oil, almond oil, olive oil, jojoba oil, sesame oil, avocado oil, wheat germ oil, etc. before usage.
  11. Also, try some other essential oils like lemon oil, tea tree oil, roman chamomile oil, cypress oil, clary sage oil, carrot seed oil, Indian bay leaf oil, geranium oil, peppermint oil, patchouli oil, thyme white oil, vetiver oil, ylang-ylang oil, etc. can also be used for treating thin hair problem.
  12. For best and safe results, always use high quality and 100% pure essential oil for treating any skin or hair problems.
  13. Pregnant or nursing woman or children should not use this essential oil without consulting the health care provider.

Try these Essential Oils to Stop Hair Thinning and to Enjoy Think and Shiny Hair. Share your experience with us in the below comments box.

Filed Under: Beauty, Hair Care, Remedies

« Previous Page
Next Page »

Footer

DIY Remedies is a participant in the Amazon Services LLC Associates Program, an affiliate advertising program designed to provide a means for sites to earn advertising fees by advertising and linking to amazon.com.

  • Home
  • Affiliate Disclosure
  • Disclaimer
  • Terms and Conditions
  • Privacy Policy
  • About Me
  • Contact Us
Copyright © 2020 · DIYRemedies.org