• Skip to primary navigation
  • Skip to main content
  • Skip to footer

DIY REMEDIES

Radiant Wellness: Empowering Your Health and Beauty

  • Home
  • Recent Articles
  • Remedies A – Z
  • DIY Smoothies
  • Reviews
  • About Me
  • Contact Us

Home Remedies

Home Remedies to Get Rid of Sunspots Naturally

December 23, 2017 By Gnanika Leave a Comment

Home Remedies to Get Rid of Sunspots Naturally

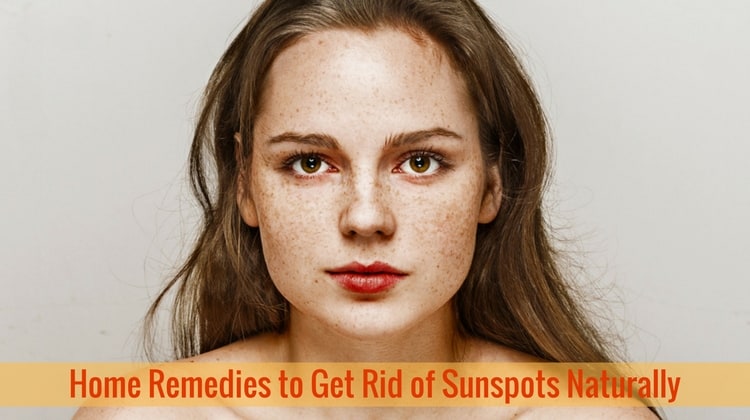
Home remedies to get rid of sun spots naturally:

Covering the sun spots using cosmetics is quiet annoying. Isn’t it?

They can spoil your entire look. But don’t worry in this article we have mentioned various different methods to get rid of sun spots. Before going through the remedies let us understand about the sun spots.

What are sunspots? How do they occur?

Sun spots also known as solar lentigines are caused due to frequent exposure of skin to the harmful sun radiations.

When the skin is exposed to sun light, the melanocytes present in the bottom layer of the skin produces more amount of melanin in order to protect skin from damaging. Thus, skin turns pink or brownish in colour.

Sun spots can be of different sizes or shapes and are found on all the areas that are exposed to sun such as face, hands, head etc. Apart from sun exposure, using tanning bed is also responsible for sun spots as it increases the production of melanin.

However, age and skin type are two major factors that must be considered for sun spots because old age people are more likely to get sun spots and persons with sensitive and fair skin also suffer from sun spots.

In severe cases these sun spots turn into actinic keratoses where, brown, pink or red coloured patches appear on the skin that are dry and thick.

However, home remedies are easiest and cheapest ways to treat sun spots naturally that keeps your skin clear and glowing. Lemon, aloevera, apple cider vinegar provides nourishment to the skin and also helps in removing the dead skin cells. So, using these methods regularly helps you to get rid of sun spots.

In this article, we have put together a list of natural remedies along with some other techniques that are helpful in removal of sun spots.

Top 12 easiest methods to remove sun spots naturally:

Method 1: Lemon Juice:

Lemon juice is helpful in removing sunspots because it is rich in vitamin C and absorbic acid that helps in boosting the immune system of the body. It fights against the free radicals and protects skin from various problems. It also works as an exfoliating agent that removes all the dead skin cells from the skin.

How to use?

  • Take a lemon and squeeze out the juice from it.
  • Then, soak a cotton ball in this juice and apply it over the face, neck etc.
  • Leave it to dry for about 20-30 minutes and wash it using cold water.
  • Take small amount of moisturizer and apply it gently.

Note:

  • Your skin may become sensitive after applying lemon juice so, do not get exposed to sunlight after using this method.
  • If you have an extra-sensitive skin then, you can dilute lemon juice with some small amount of water and apply it.

Method 2: Aloevera:

Aloevera acts as exfoliating agent and removes all the dead skin cells from the affected areas. It has a compound that is helpful in lightening the dark spots and sun spots. Aloevera also provides soothing effect to the skin and avoids irritation or itching due to sun spots.

How to use?

  • Take a aloe leaf and scrap the aloevera gel from it and pour it into a bowl.
  • Now, apply this gel on all the infected parts of the skin.
  • Leave it for about 20-30 minutes and then wash using water.

Method 3: Green tea:

Green tea is capable of repairing the skin that is damaged from the UV rays. It has antioxidants that help in rejuvenating the skin cells and helps in treatment of sun spots.

How to use?

  • Take a cup of hot water and put a green tea bag in that cup.
  • Allow it to steep for about 10 minutes and then, remove the tea bag.
  • Upon cooling you can place the green tea bag on the affected areas.
  • Or else take a cotton ball and dip it in the green tea.
  • Then, apply it on the face, neck etc. and leave for about 30 minutes.
  • Afterwards, you can wash using water.

Method 4: Onion:

Onion has various different properties that are beneficial for skin care. It boosts up the production of collagen and maintains a healthy and glowing skin. the special property of the onion helps in clearing the skin by removing the dark spots. So, you can get rid of sun spots easily by using onions.

How to use?

  • Take an onion and chop it into thin slices by peeling the outer cover.
  • Now, rub these slices across the sun spots affected area and leave for about 20-30 minutes.
  • Later, you can wash it off using cool water.

Method 5: Milk or buttermilk:

Milk or buttermilk has lactic acid in it and it helps in fading the skin pigmentation naturally and it also lightens the sunspots. Milk is also used as cleanser to remove the dirt and oil from the skin. It provides calming and soothing effect against the itching or irritation that has occurred due to sun spots.

How to use?

  • Take a small bowl with cold milk or buttermilk.
  • Now, dip a cotton ball into it and apply it directly on the skin.
  • Allow it to soak down for about 20-30 minutes.
  • Then, wash your face using water.

Method 6: Vitamin E:

Vitamin E blocks the free radicals from the skin and prevents any kind of damage to the skin. It has anti-oxidants that fights against the free radicals and protects skin. thus, it removes the spots from the skin and allows the growth of new skin cells.

How to use?

  • Take 1 or 2 vitamin E capsule.
  • Cut them and remove the oil from it.
  • Apply this vitamin E oil directly on the sun spots and leave for 30 minutes.
  • Afterwards, you can wash using water.

Note:

  • Vitamin E oil can be replaced by wheat-germ oil as it is one of the best sources of vitamin E.

Method 7: Apple Cider Vinegar:

Apple cider vinegar contains alpha hydroxy acids that are helpful in removing the dead skin cells layers from the skin. it is also helpful in the lightening  the skin. Thus, apple cider vinegar is very much helpful in treating the sun spots.

How to use?

  • Take small amount of apple cider vinegar in a bowl.
  • Place a cotton ball in that and apply it directly on the affected area.
  • Allow it to soak down for about 15-20 minutes.
  • Afterwards, you can wash using warm water.

Method 8:  Besan:

Besan is oldest methods used for skin care. It has slight abrasive nature that goes into the skin pores and removes all the dirt and oil from it. It also works as exfoliating agent and removes the dead skin cells and dark spots. So, besan can be used to lighten the sun spots.

How to use?

  • Take a small bowl along with 2 tablespoons of besan in it.
  • Mix it thoroughly by adding milk or buttermilk to it.
  • Now, apply this paste evenly on the affected area and wait till it dries.
  • Then, wash using warm water and later, apply moisturizer.

Method 9: Papaya:

Papaya has an enzyme called papain that is helpful in removing the dead skin cells and lightening the dark coloured skin. It also works as an exfoliator and anti-oxidant, which helps in getting rid of dark skin. So, papaya is useful in removing the sun spots.

The other nutrients and vitamins present in the papaya are helpful in maintaining healthy skin.

How to use?

  • Take a papaya and mash it properly to make a smooth paste of it.
  • Now, apply this paste evenly on the skin.
  • Allow it to stay there for about 20-30 minutes.
  • Later, you can rinse it off using water.

Method 10: Sandalwood:

Sandalwood has various properties that are helpful for skin care. It has essential oils, which is helpful in lightening the skin spots. Sandalwood provides cooling effect to the sun spots and slowly minimizes their appearance.

How to use?

  • Take a bowl and put 2 tablespoons of sandalwood powder it.
  • Now, mix thoroughly by adding required amount of rosewater.
  • Once, it is in the form of paste you can apply it all over the skin.
  • Allow it to dry completely and wash it off using water.

Method 11: Castor oil:

Castor oil provides nourishment to the skin and helps in maintaining healthy skin. It is also helpful in lightening the skin and fades away the sun spots naturally.

How to use?

  • Take 2-3 tablespoons of castor oil.
  • Dip a cotton ball in it and apply it on the sun spots.
  • Leave it for about 20-30 minutes and then, rinse off using water.

Method 12: Cucumber:

Cucumber has more amount of water and is helpful in hydrating your skin. This helps in avoid the itching or irritation of the skin. It is rich in vitamin C that fades away the sun spots easily.

How to use?

  • Take a cucumber and mash it thoroughly.
  • Apply its mixture evenly on the sun spots affected areas.
  • Leave it for about half an hour and then, rinse using water.
  • If needed, you can add yogurt or buttermilk to this.

Other natural methods to remove sun spots naturally:

  1. 1. Chickpeas: It has high amounts of potassium, fiber, vitamin B-6 and vitamin C that provides nourishment to the skin and helps in fading away the sun spots naturally.
  2. Pineapple: The presence of various nutrients in pineapple helps in maintaining healthy skin. The exfoliating nature of pineapple removes the dead skin cells from the sun spots and makes skin clearer.
  3. Potato: It helps in exfoliating the skin and removes all the dead skin cells from the affected area. It is also useful in lightening the dark spots. So, you can get rid of sun spots using potato.
  4. 4. Coconut water: It contains the anti-aging property that helps in tightening the skin and flushing out the impurities from the skin pores. Coconut water is helpful in removing any of the spots present on the skin such as sun spots, dark spots, age spots etc.
  5. 5. Fullers earth: It controls the oil production of the skin. The cooling nature of this material is helpful in providing moisturization. It is also used as exfoliating agent and is also helpful in removing the tan. So, fuller’s earth has ability to repair the skin from UV rays damage.

Some more approaches that are helpful in getting rid of sun spots:

You can use certain creams that contain azelaic acid, kojic acid, glycolic acid, hydroquinone etc. that balances the hyper pigmentation of the skin and removes all the sun spots.

  1. Laser method: This method helps in removing the outer layer of the sunspots electrically that lightens the sun spots. This is one of the safe methods that helps in removal of sun spots.
  2. Chemical peel: Dermatologists make use of some chemicals to peel the upper layer of sun spots and lower their appearance.
  3. Cryotherapy: In this process dermatologists uses nitrogen and freeze the sun spots. After some time the frozen sun spots start falling down naturally.

Tips and precautions for removal of sun spots:

  1. Applying SPF 50+ sunscreen is the best method to stay away from sun spots and other sun ray problems.
  2. Regularly keep on exfoliating the skin as it removes the dead skin cells from the skin and de tans it.
  3. Try avoiding the exposure to sun during afternoon 12 to 3 o clock because this is the peak hours where sun rays are stronger.
  4. If you are not finding any relief from the above mentioned methods then, you can consult dermatologists for the treatment.
  5. It is very important to hydrate the skin regularly to avoid sun spots problem.

Frequently asked questions:

How long will it take to get rid of sun spots?

By using the methods that are mentioned above it takes about 1 or 2 weeks to get rid of sun spots. However, it depends on the intensity of the spot and the skins healing ability.

Which sunscreen lotion is best for keeping skin safe?

Sunscreen lotions are very beneficial in protecting the skin from the harmful UVA and UVB rays. Purchase the sunscreen that has SPF 50 or 50+ protection, which means it can protect skin from both UVA and UVB rays.

Which is the most effective and best way to remove sun spots?

In the above article we have mentioned various methods to get rid of sun spots. But applying lemon juice directly on the sun spots is one of the best ways to remove them quickly.

Can sun spots occur on neck?

Red and rough spots on the skin usually known as sun spots occur due to the exposure to sun. They are found on all the area of the body that gets exposed to sun light such as face head neck, arms, hands, sometimes legs too.

Are sun spots cancerous?

There are many types of spots that appear on the skin such as age spots, liver spots, moles, sun spots, freckles etc. However, if your skin is severely damaged due to the heavy exposure of sun then, chances are higher that they may cause cancer.

Summary:

Sun spots are the patches that are observed on the skin due to exposure to sun light. You can get rid of these spots by using the natural home remedies that are mentioned above.

If you have any queries kindly write to us in the comment section below. Our team of experts will clarify them as soon as possible.

Filed Under: Beauty, Home Remedies, Remedies, Skin

Turmeric to Get Relief from Back Pain

December 20, 2017 By Gnanika Leave a Comment

Turmeric to Get Relief from Back Pain

Turmeric to Get Relief from Back Pain

With the effect of modernization, makes everyone work easy and simplified with the use of computers or gadgets. When you constantly work on computers, may suffer from back pain. It can also be due to your regular activities like bike riding and weight lifting (i.e. related to the improper body positioning). If it is continued further with ignorance you might face severe problems at late 30’s and 40’s. So its better to prevent back pain problem at early stages with proper guidance than going for surgeries.

Here in this article I have suggested to make use of turmeric for your back pain problem. Turmeric is a wonderful natural home remedy that has antioxidants and anti-inflammatory properties to cure back pain and gives instant relief.

Follow on this article to know how turmeric serves best for your spine problem naturally.

Symptoms For Back pain

Here are few symptoms that helps you to identify the severe nature of the back pain problem.

  • Muscle aches.
  • Stabbing pain.
  • Limited body flexibility.
  • Swelling at the back.
  • Severe pain in the abdomen.
  • Increased body temperature.
  • Loss of control over bladder and bowel moments.
  • Sudden weight loss due to the change in food habits.

Causes for Back Pain

Given below are the possible causes for your back pain. 

  • Over stress.
  • Strained muscles.
  • Sleeping disorders.
  • Infections on spine.
  • When you play sports.
  • Lifting heavy weight.
  • Sudden body movements.
  • Handling something improperly.
  • Your daily activities like bending, pulling, pushing and over-stretching for a long time.

Home Remedies for Back Pain using Turmeric

Here are some effective home remedies that help to cure your back pain problem effectively. Regular follow up of these home remedies will help you to eliminate your back pain problem completely.

Remedy-1 (Turmeric Milk)

Drinking the wonderful combination of turmeric and milk gives fantastic results in reducing the back pain and inflammation.  A glass of warm turmeric milk helps you to relieve stress and boosts the mood. Turmeric milk is very simple to prepare and the procedure is given below…

Procedure 

  • Take a tbsp of turmeric powder and a glass of organic milk.
  • Pour milk into the container and allow it to warm for 10 minutes.
  • Add 1 tbsp of turmeric powder to the milk and blend well.
  • Turn off the stove and drink a glass of turmeric milk  daily for better results.

Dosage: Consuming a glass (200ml) of warm turmeric milk daily  relieves back pain temporarily.

Remedy-2 (Turmeric Tea)

Turmeric tea is a good option for tea lovers who want to get relief from severe back pain. To prepare turmeric tea, firstly take turmeric root and powdered before its use.

A study  shows that an active compound called curcumin in turmeric helps to treat back pain. Freshly brewed turmeric tea has all the health benefits by reducing the inflammations.

Procedure

  • Take 4 cups of water and boil it for 10 minutes.
  • Now add 1 tbsp of turmeric to the boiling water.
  • Keep the flame in simmer mode and allow it to warm for 10 more minutes.
  • Strain the solution and add a tbsp of lemon juice for better taste.

If you are not a turmeric fan then take a cup of coconut or almond milk and warm gently. Now add a tbsp of turmeric powder and (1/4) cup of sweetener as per your wish. Apart from back pain, it also relieves stress and soothe sore throat.

Remedy-3 (Turmeric and Coconut Oil)

Though turmeric alone can give best results, is combined with coconut oil for the sake of individuals. It brings positive results on your back pain when applied evenly.

Procedure

  • Put 1 tbsp of turmeric powder and 2-3 tbsp of coconut oil in a small bowl.
  • Blend both the ingredients to form a thick paste.
  • Apply it on your back pain prone area and do massage for 10-15 minutes.
  • Take a nap for some time and you see tremendous results when you woke up.

Dosage: Finger pinch of turmeric and coconut oil mixture is applied for better results.

Remedy-4 (Turmeric, Ginger and Honey)

Turmeric and ginger has many health benefits and when you combine both the ingredients gives amazing results than the individual can perform. When you combine turmeric and ginger to treat back pain problems, the antioxidant and anti-inflammatory properties help to reduce pain and brings stiffness to your body. Here is the simple procedure that makes use of turmeric and ginger given below..

Procedure

  • For this you need 2 cups of water, 1 tbsp of turmeric and 1 tbsp of ginger.
  • Boil 2 cups of water in a medium flame and then add 1tbsp of both chopped turmeric and ginger or in powder form.
  • Allow the solution to boil for some more time and strain well before you transfer it to a glass.
  • Now add 2 tbsp of honey to the solution for good taste and stir well with a spoon.

Dosage:  Drink a glass of this soothing juice daily for optimized results.

Remedy-5 (Turmeric Tincture)

It is an extract of turmeric plant that contains 20-60% of ethanol. Some individuals use turmeric tincture for quick pain relief actions. We recommend only to use  turmeric tincture in case of burns on long term. Take 10-15 drops of turmeric tincture depending on back pain condition. It is good to add in teas, juice or smoothies. Before you use this turmeric tincture for fast pain relief, it’s better to consult a doctor.

Dosage: 15 drops of turmeric tincture, 4 times a day.

Remedy-6 (Turmeric and Aloe Vera Gel)

Aloe vera gel is known for its soothy and moisturizing ailments. Though aloe vera gel alone can give tremendous results, antioxidant and antibacterial properties of aloe vera gel added with turmeric powder lowers the back pain problem. A simple procedure to make use of aloe vera gel and turmeric powder is given below…

Procedure

  • Take medium sized aloe vera leaf and slice it with a knife.
  • Now extract the fresh aloe vera gel from the chopped sliced and transfer it to a small bowl.
  • Add turmeric powder to the aloe vera gel and stir well.
  • Rub the fresh mixture on the lower back area for fast relief.

Dosage: Apply hand fist of aloe vera gel on back pain areas.

Remedy-7 (Turmeric, Coconut oil and Bromelain)  

Back pain is the major problem for aged people. They might suffer from blood pressure and diabetes and undergo several medications. So the use of turmeric and Bromelain ingredients is a good choice. Bromelain is an enzyme from the pineapple juice combines with turmeric powder to relieve from back pain. It also controls the blood pressure and sugar levels in the body.

Procedure

  • Take 1 tbsp of turmeric powder, 2 tbsp of coconut oil and 2 tbsp of Bromelain.
  • Pour all the 3 ingredients in a bowl and stir well using a spoon or fork.
  • Warm the solution for 5 minutes and allow it to cool for 2 minutes.
  • Now apply the solution on your waist and massage gently with fingers.
  • This solution will help you to relax and cure back pain completely.
  • Instead of coconut oil you can also use almond oil as a substitute in the same quantities.

Dosage: 200-250 ml of this solution is required as 3 parts per day.

Remedy-8 (Turmeric and Eucalyptus Oil)

Eucalyptus oil is an another amazing ingredient to cure back pain effectively. The antioxidant and antiseptic properties of eucalyptus oil when combined with turmeric powder gives quick relief than using other ingredients. Here is the simple procedure to apply this mixture on back pain areas.

Procedure

  • Pour 6-8 eucalyptus oil (100% pure) in a small bowl.
  • Add 1 tbsp of turmeric powder to the eucalyptus oil and mix well so that no lumps are formed.
  • Gently massage with this mixture for 10 minutes on your waist.
  • Repeat the process once in every 2-3 days to get rid of your back pain completely.

Dosage: A small cup or 200 ml of turmeric and eucalyptus oil mixture daily

Remedy-9 (Turmeric, Coconut Oil and Sesame Oil)

For treating back pain problem, we make use of turmeric, coconut oil and sesame oil. This trio- combination when mixed together lessen the pain overnight and is also good for treating headaches, fractures and other injuries.

Procedure 

  • Take 1 tbsp of turmeric powder, 2 tbsp of sesame oil and 3 tbsp of coconut oil.
  • Pour all the ingredients in a small bowl and blend well.
  • Now warm the essential oil for 5-10 minutes and allow it to cool for some time.
  • Apply the oil on your waist where you experience the pain.
  • Massage over the waist with fingers in circular motion for 15 minutes.
  • Rinse with a warm cloth.
  • Repeat the process 2-3 times a day to lessen the back pain.

Dosage: A cup or 200 ml of this trio- combination oil per day.

Remedy-10 (Turmeric and Basil Leaves)

Basil is called as “The King of Herbs” for its culinary and therapeutic properties. It is composed of antibacterial, antiseptic, anti-fungal and antioxidant properties like Eugenol, Tripenol, Citronellol compounds  that help to treat back pain, headache, stomachache and several other problems. Here  we gave a simple process how basil leaves work well with turmeric powder to treat back pain.

Procedure

  • Take 1 tbsp of turmeric powder, 2 cups of water and hand full of basil leaves.
  • Warm the water by placing on Heater (medium flame) for 10 minutes and then add basil leaves.
  • Allow it to boil for 10 minutes till the solution becomes exactly half compared to the beginning.
  • Let the solution be cooled for some time and apply it on your waist.
  • This solution helps to absorb the heat from the body and heals quickly.

Dosage: A medium sized cup or 200-300 ml of the solution per day.

Precautions and Tips  

  • If your body have less immune system then its better not to lift heavy weights.
  • Do exercise and yoga regularly, to keep your back muscles strong and healthy.
  • Poor posture can be a sign of back pain, so its better to focus on good postures.
  • Pregnant women must be very careful as it can lead to the miscarriage of babies.
  • Eat healthy fruits, salads and vegetables that are rich in vitamin C to  lead happy and successful life.
  • If you need to carry heavy loads then make it simple by shifting into 2 smaller bags than 1 heavy bag.
  • Keep your hands on the armrest when you sit on a chair. Turn your entire body rather than twisting your waist.
  • If you are in an environment where your job is to sit and work completely then take a walk or do stretches for 5 minutes per hour.
  • Sleep well on a medium to firm mattresses as it can relieve your back pain problem whereas soft mattresses pushes back out of alignment.
  • Maintain healthy diet and optimum weight (i.e. According to the BMI-chart) as overweight may result in severe back pain problem and cannot bear extra weight.
  • Do not arch your back by doing exercises, watching TV or sitting in a chair. Keep it upright and also avoid crouching postures.
  • Turmeric powder is safe to use unless you take in limited amounts. But one should be very careful so as not to take too much of turmeric results in side effects on pregnant women and diabetic patients.

By following these tips and home remedies using turmeric you can cure back pain instantly without any side effects. Do you have any other remedies for back pain using turmeric or tried at home? Please share your experience with us in the comments section given below.

Filed Under: Home Remedies, Remedies

Home Remedies to Get Black Hair Naturally

December 19, 2017 By Gnanika Leave a Comment

Home Remedies to Get Black Hair Naturally

Do you know that people spend $2.56 billion per year on hair beauty products worldwide? It’s quite interesting  to know how much people care for their hair. But on the other side, get habituated to these profit-oriented commercial products.

There is a belief that women look beautiful with long black hair. Due to the modern lifestyle, age, genes, stress, and pollution at very young ages the color of  your hair changes. The commercial hair beauty products make use of chemicals like Parabens, Formaldehydes that can cause severe allergic reactions  and is not safe for your eyes & skin.

You can easily get black hair with the use of home ingredients in a short time. Here in this article we come up with a solution to your problem by providing genuine information about how to use the natural ingredients to darken your hair color.

For more information read the full length article.

Home Remedies for Black Hair

Here are some effective home remedies that help  you to have shiny black hair from and also protect from  harmful toxins. Regular follow up of these remedies every fortnight will help you to make your hair look shiny, attractive and healthy.

Remedy-1 (Coconut Oil)

Coconut oil is a plant based oil that is high in vitamin E, vitamin K, fatty acids, lauric acid and capric acid. When you apply coconut oil to your hair, these compounds help to retain moisture levels and penetrates the hair shaft. It is highly beneficial for nourishing black hair by producing strong and shiny hair. Here we discussed some possible combinations of coconut oil to get black hair naturally.

Raw Honey and coconut oil combination do wonders for dull hair. Together works well as moisturizing and rejuvenating agent. It is also good to apply in require amounts on your hair to gain black color.

For this mix both the ingredients and apply it on dry hair. Massage with your fingers to distribute the mixture evenly on hair. Let it be settled on your hair for 15-20 minutes and wash with water.

Curry leaves are a great flavored leaves mostly used by the south Indian people. High vitamin B content in curry leaves added with coconut oil helps to nourish your hair. Firstly, boil the coconut oil in medium flame and add curry leaves to it. Boil until the leaves become black and turn off the flame to cool for some time. Apply the solution on your hair, stay overnight and the very next day wash with shampoo.

Simply mix a tbsp of Lemon Juice and coconut oil in a small bowl and massage on your hair with fingers. After 1 hour or so wash with a natural shampoo.  Do this process for every 2-3 days  for your strong and darkening hair.

In other cases, you may also use castor oil, olive oil which also serves best to make your hair black  and strengthens the thick hair roots.

Remedy-2 (Henna)

Henna is a natural dye prepared from the henna tree known for its hair repairing properties. It is used as a natural home remedy for black hair over the years by the ancient Indian women. A PPD (Paraphenylenediamine) compound is responsible for the blackening of hair. A simple and easy procedure to make henna as a natural home remedy for black hair is given below.

  • Firstly, pour henna powder in a bowl made with steel or plastic.
  • Add coffee powder, 2 tbsp of lemon juice and curd simultaneously to the henna and stir well. The Polyphenol in coffee powder neutralizes the reddish color nature of the henna.
  • Apply the mixture on your hair and do it at least twice a week.

Hibiscus, Henna and Amla trio combination is fully packed with antioxidants and proteins helps to get black hair growth very quickly. All these 3 ingredients added to form a thick paste, is applied to hair and scalp. Massage gently with fingers in a circular motion to  apply evenly touching the deep roots of hair.

For a quick change in your hair color, use Henna and Soap nut combination daily for a week.

Remedy-3 (Lemon)

Black pepper and lemon juice combination rejuvenate the scalp to promote blackening hair growth. For this take 2-3 tbsp of pepper and 1 tbsp of lemon juice. Blend them to form a thick paste. Apply it on your scalp and allow it to dry for 10-15 minutes. Now rinse your hair with cool water. Repeat the process for every 2-3 days. This is just done before you attend kitty parties to form a silky black hair that looks stunning.

Lemon and Almond oil are added together in a small bowl to form a thick paste and do massage with this thick paste on your hair for 15 minutes. The vitamin E and antioxidants rich in Almond oil help to prevent from hair spoiling and makes your hair look black, shiny.

Remedy-4 (Amla)

Amla on hair has positive impacts over millions of people. Many of the commercial hair products uses Amla added with harmful chemicals to make hair black. It is not good to use and results in some severe allergic reactions when applied to your hair. So its better to use Amla powder (Tannis and Polyphenols) used to treat several problems like hair darkening.

Prepare the solution simply by adding Amla powder to  a cup of water and 1 tbsp of lemon juice. Apply this wonderful solution to make your hair black once or twice a week. For better results you can also add henna and lemon juice as ingredients to the Amla powder.

Amla, Hurd and Bahara is another great trio-combination that helps to blacken your hair naturally at home when applied in required quantities. Over dosage of these ingredients on your hair may result in some severe allergic reactions.

Remedy-5 (Black Tea)

Black tea extracted from the leaves has very strong flavor that suits for your hair. The antioxidants and antiseptic properties of  black tea will revive the brittle hair follicles.

  • A simple procedure to make use of black tea for your hair is by taking a black tea bag and a cup of water.
  • Boil the water in medium flame for 5 minutes and dip the black tea bags in the hot water.
  • Now separate the tea particles from the hot tea by using tea strainer.
  • For better results you can also add 2 tbsp of lemon juice to the hot tea.
  • Apply it on your hair, scalp and massage with your fingers in circular motion for 5 minutes.

Remedy-6 (Sesame Seeds)

Black sesame seeds contain a good source of vitamin E, lecithin and protein are good for your growing  and blackening hair. When you use this method for black hair problems, it may not happen overnight; takes weeks to months time to notice black hair. For this, soak the sesame seeds in a bowl of water and  then make it into a fine paste using Grinder. Apply this thick paste on your hair and scalp which results in a better quality of hair growth and looks lustrous.

Remedy-7 (Onion Paste)

Many people avoid chopping onions as it releases strong flavor that burns your eyes. Apart from this it also acts as a wonderful remedy for treating your hair naturally. You can directly apply the onion pulp on your hair touching the roots and follicles.

Another method using onion pulp and lemon juice combination is given below….

  • Take out onion pulp and extract the juice from it.
  • Now add 2 tbsp of lemon juice to the onion extracts.
  • Stir well and apply it on your scalp and hair follicles.
  • Allow the mixture to dry for 30-45 minutes and clean with a mild shampoo.
  • Repeat the procedure daily for a month till you observe the difference.

 Remedy-8 (Carrot)

Till now you heard about the health benefits of carrot juice. You will be surprised to know the amazing benefits of carrots for  your black hair. Drinking a glass of carrot juice in the early morning is a wonderful remedy to make your hair black.

Some crazy people apply carrot juice directly on hair which does not give much impact on hair coloring than drinking the juice. Consume the fresh juice daily for a month or so toll you see the difference in your hair.

Remedy-9 (Ribbed Gourd)

Many of you know that ribbed gourd is a  healthy vegetable that helps to cure several health problems.    It is absolutely true and much benefitted for your hair. This veggie is full of fiber-rich that helps to make your hair color black.

For this peel off the ribbed gourd and cut into small pieces using a knife or  chopper. Insert the gourd pieces into a Mixer and grind it for 2 minutes. Take out the juice and filter all the unnecessary extracts from it. Now store the juice in a glass and add a small cup of coconut oil to it.  Heat the mixture and apply oil on your hair and scalp deeply. Do again this process until you see the changes in your hair.

Remedy-10 (Orange Juice)

A cup of raw orange juice contains 112 calories, 20 grams of sugars and provides citric acid, vitamin C, potassium, folate and thiamin when consumed. Using orange juice is an effective way to have healthy, thick and dark hair.

Take an orange and peel off so that it can is converted into a pulp. Now add Amla powder to the orange juice and mix well. You can see the change in color of the juice when mixed with Amla powder. Apply the solution that brilliantly works to create a black and thick hair.

Remedy-11 (Mango)

Raw mango is helpful for gaining black color of your hair. For this take some handful of leaves, unripe mangoes and peel off the skin. Now blend them very well by adding  2-3tbsp of oil to it.  Allow the mixture to get direct sunlight for a long time and then apply it on your hair that works as a wonderful natural solution.

Instead of this thick paste you can apply mango stone oil to get black hair which magically turns white hair into black hair. If you apply this oil before you attain certain age, will stop the hair from turning white color and prevents dandruff problem.

Remedy-12 (Ghee with Mulethi)

For this you need to take 1 kg of ghee or butter, 1 liter of Amla juice and 250 grams of Mulethi in a big bowl or container. Heat the ingredients well in low-medium flame for 20-30 minutes. Allow the water to evaporate completely from the mixture and the actual content is ready for you to use. Store the obtained mixture in a glass and use this hair mask every day you go for a shower bath. It is very useful and effective remedy to bring black color to your hair.

Remedy-13 (Sage)

As the sage leaves fully comprises of antioxidant and antiseptic properties,helps to promote black hair growth and prevents from premature graying.  A simple procedure to make use of sage leaves to get black hair is given below..

Take a handful of sage leaves and soak them in a  bowl containing water. Boil the leaves for some time (say 15-20 minutes). Now transfer the solution into the spray bottle and gently spray the solution on hair gently before you apply oil to your hair. Rinse your hair with lukewarm water. For amazing results, repeat the process 2-3 times a week.

Remedy-14 (Earth water)

It may look awkward, but gives fantastic results when applied to your hair. Take out soil from the garden in a bowl and add water to it. Now filter the insects and small stones from it. You may use cotton cloth or  strainer to filter the water and other contents in a separate  jar. Now apply this liquid  solution directly on your hair  and do massage evenly with fingers.  After some hours of time take a shower bath with cold water. It will gradually reduce headaches, sleeplessness and makes your hair look long lustrous.

Remedy-15 (Aloe Vera)

Aloe vera is known for its moisturizing and nourishing properties of hair. It is a traditional Ayurvedic medicine that  contains Aloin compound to treat skin and hair problems. You just need to have a lot patience to use aloe vera as natural remedy that does not give instantaneous results.

For this you can add  1tbsp of Brahmi leaf powder to the 2 tbsp of aloe vera gel and apply it on your hair. If necessary, you can add 2 tbsp of Amla juice to the mixture. Let the mixture be dry for some time and wash with cool water. If you don’t find Brahmi leaf powder at stores, you can directly apply aloe vera gel to the hair without adding any other ingredient.

Precautions and Tips

  • Avoid using hair products that contain harmful toxins.
  • Consult a doctor or dermatologist if the problem is very severe.
  • Always take a shower bath when you swim in a chlorinated water pool.
  • Whenever you prefer a natural remedy, wash off your hair with cold water.
  • Avoid smoking and alcohol consumption as tit diminishes the hair growth and color.
  • For obtaining natural hair color, simply grind guava leaves and apply it on your hair.
  • Do regular exercise and yoga to relieve from stress and improves blood circulation levels.
  • Apply herbal hair oils regularly to prevent from hair problems like dandruff, hair loss and greying.
  • Drink plenty of water to stay strong, healthy and to prevent from severe side effects like allergies, infections and headaches.
  • Henna and indigo is a great combination for your hair turning black color, but be sure to wash your hair immediately with natural shampoos as indigo contains harmful chemicals that damages your hair growth.

Have you tried any of these safe, natural methods for attaining black hair? Please share your experience with us in the comment section given below.

Filed Under: Hair Care, Home Remedies, Remedies

How to Get Rid of Acne/Pimple Scabs Fast

December 18, 2017 By Gnanika Leave a Comment

How to Get Rid of Acne/Pimple Scabs Fast

How to Get Rid of Pimple Scabs Fast?

Repeated pimple and acne breakouts are embarrassing and irritating enough, formation of scabs during the healing phase make things even worse by turning the pimples and acne even more unsightly.

Scabs are protective crusts that form on the top of acne and pimples during the healing phase. They are made up of dried red and white blood cells and blood fluids. The scab acts as a protective covering on top of the opening of the pimple that allows the infection to heal from within.

But the unsightly appearance of the scabs along with their irritating crusty texture tempts us to pull on them. But pulling off the scab by force before the pimple is healed completely only makes things worse by opening it to further infection and increasing the chances of scarring.

The best way to deal with pimple scabs is to use some home remedies and natural treatments to speed up the healing process that goes beneath the scab and keep the scab soft and well-moisturized at the same time.

Ways to Heal Pimple Scabs

Cleanse the scabs – Cleaning the scabs at least twice a day using an antibacterial cleaner will prevent further infection and stop acne and pimples from spreading. Wet the area with water and apply a little amount of the facial cleanse to it using your fingers. Clean the area using a clean washcloth and pat dry.

Keep it moisturized – After cleaning the scab using a cleanser, apply any natural oil to it to keep it well-moisturized. This will prevent itching and irritation due to dryness.  Take some olive oil or almond oil in a bowl. Dip a q-tip in the oil and apply it to the scab.

Use warm Compress – The moisture and heat from the warm compress will soften the scan and help it to come off naturally without leaving behind any scar. Soak a clean cloth in warm water. Wring out the excess water and press the cloth on the scab. Leave it for 10 to 15 minutes. Repeat this twice a day till the scab comes off.

Avoid Touching or Scratching the Scabs – Scratching or picking on the scab will only delay the healing process and increase the chances of scarring. Touching the scab repeatedly will also increase the risk of spreading the pimple-causing bacteria.

Home Remedies to Get Rid of Pimple and Acne Scabs Quickly

Plantain Leaves – Plantain leaves are widely available in people’s gardens and backyards. The antibiotic and wound healing property of plantain leaves speed up the healing process of the pimples.

Usage:

  • Prepare a paste by boiling 10 fresh plantain leaves in water and then mashing them
  • Allow this paste to cool and then add a few drops of almond or castor oil to it
  • Apply this mixture on the scabs and leave it overnight
  • Wash off the next morning

Aloe Vera Gel – Pure aloe vera gel helps to keep the scab well-moisturized and prevents irritation and itching. The anti-inflammatory properties of aloe vera also speed up the healing process and reduce redness and swelling.

Usage:

  • Cut off a fresh aloe vera leaf
  • Scrape out the gel from inside the leaf
  • Apply a thick layer of this gel on the scab
  • Leave in on for a few hours and then wipe off with a cotton ball

Honey – The humectant property of honey helps to trap moisture in the scab and prevents it from over-drying. The antibacterial properties of honey help to heal the pimple and prevent further outbreaks.

Usage:

  • Take a small amount on raw organic honey in a bowl
  • Apply it on the scab generously
  • Leave it on for an hour and then wipe off with a wet cotton ball

Baking Soda – The potent antibacterial properties of baking soda boosts the healing of the pimple while its astringent property dries it out from within without irritating the scab.

Usage:

  • Made a paste by mixing baking soda with water
  • Apply this paste on the scabs, coving them completely
  • Let it dry out and then wash off with water

Garlic – The anti-bacterial, antifungal and healing properties of garlic boosts the healing of the pimple without scarring.

Usage:

  • Soak a few cloves of garlic in olive oil for 2 hours
  • Now crush the garlic along with the oil and make a paste
  • Apply this to the scabs and wait for 5 to 10 minutes
  • Wash it off with water
  • Note – Those with sensitive skin may experience irritation and burning due to garlic.

Apple Cider Vinegar – The antibacterial, antiviral and antifungal properties of apple cider vinegar helps to heal the pimples and acne from within. Exfoliating properties of apple cider vinegar helps to remove the scab faster. It also promotes the regeneration of new skin cells which prevents scarring.

Usage:

  • Take 50 ml of water in a cup
  • Add 5 ml of apple cider vinegar to it
  • Dip a cotton ball in this mixture and place it on the scab
  • Leave it on for 20 minutes and then wash off with water

Tea Tree Oil – Tea tree oil is widely used to treat acne and pimples because of its potent antiseptic properties. When applied to the scabs, it can help to prevent infections and speared of the bacteria.

Usage:

  • Add a few drops of tea tree oil on a cotton ball
  • Place it on the scab and leave it on for 30 minutes
  • Reapply the oil 2 times a day till the pimple and healed completely

Calendula Oil Mixture – Calendula oil is known for its amazing anti-inflammatory and vulnerary action that heals stubborn wounds which makes it a common ingredient in antiseptic creams and ointments. It also helps to sooth and softens the scabs and prevents irritation.

Usage:

  • Take a tablespoon of almond or olive oil in a bowl
  • Add a few drops of calendula oil to it and mix well
  • Apply this mixture to the scabs using a q-tip
  • Reapply it 3 to 4 times every day till the scab comes off

Epsom Salt Soak – Epsom salt has the capacity to soothe the inflammation and reduce irritation. Soaking the scabs in Epsom salt water also helps to moisturize the scab and reduces the chances of scarring.

Usage:

  • Take a container filled with lukewarm water
  • Add a tablespoon of Epsom salt to it and mix well
  • Dip a cotton ball in this water and then place it on the scab
  • Do this several times a day for a few days till the scab comes off

Petroleum Jelly – Petroleum jelly forms a protecting layer over the scab that prevents drying and irritation, reduces the chances of infection and quickens the healing process of the pimple.

Usage:

  • Clean your face with an antibacterial cleanser
  • Dry your face with a clean towel
  • Apply a small amount of petroleum jelly all over the scab
  • Reapply it whenever you feel dryness or irritation in the scab

So, the next time you feel tempted to pick on your pimple scabs, remember that it will only worsen the situation. Use these home remedies instead in order to heal the scabs from within and prevent infection and scarring.

Filed Under: Acne, Home Remedies, Remedies

Best Ways to Get Rid of Gnats Infestation

December 15, 2017 By Sruthika Leave a Comment

Best Ways to Get Rid of Gnats Infestation

Do you know that they are some guest resides unknowingly in many corners and crevices of your house until their buzzing presence escalates to discomfort? Gnats are such flying small insects that live in your house and carry parasites to spread diseases. They feed on blood, plants and other insects and lay eggs near the aquatic places and indoor plants. The gnats are seen around compost pile or moist soil. Gnats, which lay eggs and found near the indoor plants are known as fungus gnats and the other type which feeds on fruits are called as fruit flies.

Both these types of gnats have a short lifespan of around 10 days and they grow in summer. Unlike other insects, these gnats don’t house near specific areas but rather they tend to fly all across the entire house to make their existence known to everyone.

In general, we seek professional assistance by calling guys at pest control to get rid of this havoc wreaking creatures. But before spending a fortune from your pocket, we can simply follow these natural remedies at home to get rid of these unpleasant insects.

Before going into the home remedies, first of all, let’s know the cases of gnats which make them enter the home. So that you can get rid of these gnats and also prevent its recurrence.

Causes of Gnats Infestation:

  • Moisture – The humidity and moisture in the air is the main cause for the presence of gnat into the house and they commonly found in summer or winter season.
  • Fungus – A favorite food for gnats as they hover near the scrape foods, meals, vegetables or fruits that left unnoticed.
  • Dampness – Damp places like ponds, pools, potholes, ponds or any other wet areas will welcome gnats and provide home for gnats and their eggs
  • Trash – Gnats are generally found all around the trash can and other waste disposals if they left out in open. So, always be careful and close the trash can and dispose of waste material properly to avoid the overgrowth of gnats.
  • Kitchen – This acts as a hotspot for gnats why because it is the place where the gnats love to live and feed. The water around the pipes and drains will result in growing the gnats infestation.

Other causes include untidiness, improper disposal of garbage and poor sanitation for the presence of these gnats.

So, keep your kitchen and home clean and dry to keep these gnats at bay now and then. Now let’s know about some best natural ways to get rid of gnats.

Home Remedies to Get Rid of Gnats:

Instead of using those toxic insecticides or spray all over the house, which causes harm to your health (especially respiratory tract), why don’t you give a trial to some effective and simple home remedies to clear the gnats infestation quickly and naturally?

Remedy – 1: (Apple Cider Vinegar)

The usage of apple cider vinegar (ACV) is a popular and most effective natural remedy that helps you in getting rid of the fruit flies and gnats why because they attracted to its smell and gets trapped easily into it.

Here is a detailed way on how to trap gnats and clear them from home.

  • Take a mason jar and pour raw ACV. For best results, heat ACV and pour it into the jar.
  • Then add a few drops of liquid dish soap to this ACV and stir well.
  • Cover the mouth of the jar with a plastic wrap.
  • Now poke the plastic wrap with either a fork or toothpick to make holes.
  • The holes are the entrance of files into the jar and place this jar in the areas where you found gnats or fruit flies are swarming.
  • Leave the jar to trap the gnats and when you find the jar fills with dead gnats then discard the content and rinse the jar to refill ACV to trap remaining gnats.
  • Repeat the same process until you get a complete relief from the gnats.

Note: If you don’t have ACV then you can simply use white vinegar to get the same results.

Remedy – 2: (Red Wine)

The gnats will be easily attracted to red wine. So, we can use it to trap them and get rid of the infestation.

Have a look at how to use red wine to trap gnats.

  • Stir 1/2 cup of red wine in 1 ½ cups of water and pour this mixture into a small container.
  • Then wrap the top of the container with a plastic cover.
  • Now punch a few holes on the cover to make the gnats enter into this mix.
  • The gnats or files get drawn into the smell and they will drown into this mix easily when they come into contact.
  • Whenever you find the jar fills up with dead files then discard the contents of the jar.
  • Clean the empty container with some warm soapy water and repeat the same process until you get rid of these gnats.

Note: Or simply a few drops of dish wash in a container filled with red wine and proceed the above process (without adding water) to clear the gnats quickly.

Remedy – 3: (Lemongrass Essential Oil)

The strong-smelling lemongrass oil will help to keep the gnats and fruit flies at bay. So, we can use this lemon oil as a preventive measure why because it not only kills the files but also make them not to enter the home.

  • Take 2 cups of hot water and pour this in a clean spray bottle.
  • Then add 10 – 15 drops of lemongrass essential oil in this spray bottle.
  • Shake the bottle and use it to spray near the indoor plants, around kitchen counters and other places where you find files or gnats most.
  • This homemade spray will help to clear the gnats effectively.

Note: Or simply mix 2 tablespoons of lemon scented liquid dish soap in 4 cups of water and pour this solution into a spray bottle and spray this on the infested plant to clear the gnats. At last, mist the leaves and stem of the plant where you spray on the plant with clean water to prevent the harm.

Remedy – 4: (Milk, Sugar, and Pepper)

This is another trap which is widely used to clear gnats at home. All you need is raw milk, sugar, and pepper. This sweat and hot will attract the gnats and drown in it.

  • Pour 2 cups of milk in a saucepan and then combine with 4 tablespoons of ground pepper and 8 tablespoons of raw sugar to it.
  • Stir and simmer this mixture over low heat for about 10 minutes.
  • Then pour this mix into the shallow dish and put this dish on the places where you see this files or gnats to attract and clear them.
  • Continue using this trap until you get complete relief from the gnats infestation.

Remedy – 5: (Vegetable Oil)

Use vegetable oil to simply trap and kill the gnats, especially those coming from the drain in the kitchen sink. Here is a detailed way that tells you how to use vegetable oil to get rid of gnats.

  • Take 1/4 cup of vegetable oil and pour into the drain.
  • Rub some vegetable oil on all around the edges of the drain and then close the holes of your drain by using a tape.
  • Leave for overnight and take out the tape in the next morning.
  • You will definitely notice gnats stuck on the tape and continue this process for a few days until you get a complete relief from the gnats infestation.

Note: Also, use olive oil instead of vegetable oil to deal with gnats in the kitchen or house drains.

Remedy – 6: (Bleaching)

This process is another effective remedy that helps you in dealing with the gnats all around the kitchen and bathroom sink. But never ever mix bleach with ammonia, as it causes some harm to the health with its toxic vapors.

  • First of all, remove everything from the sink and let it dry for a couple of minutes.
  • Then put a cup of bleach in the sink and make sure to wear mouth and eye protection.
  • Now run very hot water so that the bleach will drain and clear these gnats and fruit flies.
  • Repeat this action regularly till you get relief from this gnats and flies.

Remedy – 7: (Banana)

Usage of banana peel or slices or leftovers will work well in dealing with gnat infestation. This process is simple and similar just like ACV to trap the gnats.

Here is the detailed procedure that explains to you how to trap gnats using banana.

  • Place a few banana slices along with its peels in a jar.
  • Cover the jar with a plastic wrap and poke some holes on the top of the jar.
  • These holes will become an entrance for gnats or fruit flies.
  • Put this banana filled jar in a place where you find gnats and dispose the jar when once all the gnats are trapped.
  • Repeat it as needed to clear the gnats infestation.

Other Effective Remedies:

  • Using a rotten or overripe fruit as a trap will help to clear fruit flies. All you need is to place some pieces of overripe or rotten fruit (or fruit juices) in a glass jar and cover it with a plastic wrap. Pinch some holes on the plastic wrap and place the jar where you see these files and replace the jar as needed.
  • Use honey to save the gnat infested indoor plants due to its sweet smell which attracts the gnat. Simply attach a toothpick to a side of a bright colored index card and spread a thin layer of honey on the other side of the card. Place this card in the soil on the infested indoor plant. Leave it and throw the card once it filled with dead gnats and then replace the old with a new one.
  • If you don’t have jars then simply use soda bottles to trap these gnats. All you need is to cut the top third of a soda bottle and place it as a funnel that provides an inlet for the gnats to enter into the bottle but make sure to seal the open side of the bottle to prevent the gnats from escaping.
  • Rubbing alcohol will act as an effective repellent for gnats and fruit flies. Simply dilute some rubbing alcohol in water and pour this solution into an empty spray bottle. Shake it well and use it spray on the gnats to prevent its infestation.
  • Citronella oil when mixed with water and liquid dish wash will act as an excellent gnat repellent and clear them effectively. Pour this mix into a spray bottle and spray it in the gardens, sinks and near the trash cans. Also, remember that it won’t cause any harm to the plants or pets.

Tips and Precautions:

  1. Always keep your kitchen clean and dry by simply rinsing the dirty dishes immediately without leaving for overnight, clean the kitchen counter and dining area clean, keep the food in an airtight container that sealed properly, keep the fresh fruits and vegetables in refrigerator after cleaning, place the cookies and bread bags closed and sealed, clean up the food spills immediately, etc. to get rid of gnats.
  2. Keep the trash cans covered and sealed properly and also avoid keeping this bag of trash in the house overnight.
  3. Regularly wipe the lid and surfaces of garbage container with a disinfectant solution.
  4. Discard the stale water which is standing in the indoor plants or pots regularly. simply spray a little water rather than overwatering these household plants why because the moist and dampness will easily attract gnats.
  5. Keep your garden area clean by clearing the old flowers and greenery from the pots or land.
  6. Seal all the cracks and holes in the doors and windows to prevent the gnats coming into the house. You can also buy a gnat trap to prevent the fruit flies and gnats.
  7. Choose fogging as your best option if you find fruit flies or gnats have infested a large area to clear them effectively.
  8. Place nets, curtains and screens on the doors and windows to prevent the gnats entering the house and thereby infestation.
  9. Spray a mix prepared by stirring vanilla extract and water on all over the house to repel the gnats and make your home free from gnats infestation.
  10. Lay a few dryer sheets in your garden to prevent the soil from breeding or harboring in the pot by the gnats. These sheets will dry out the soil and kill the eggs (or newly formed gnats).
  11. Grow a lavender plant to prevent the manifestation of gnats and also soak a sponge in lavender oil to attract the gnats and thereby clear them completely.

Final Word:

Try all these natural ways to get rid of gnats and the irritation caused by their presence in your home. Do you know any other successful natural ways to clear these gnats in and around your house? Then share your experience with us in the below comments box.

Filed Under: Home Remedies, Remedies

Homemade Pregnancy Tests

December 14, 2017 By Gnanika Leave a Comment

Homemade Pregnancy Tests

Missed periods and vomiting? There might be some good news!!

Whenever you are expecting to conceive it is obvious that you want to confirm it as soon as possible. If you have missed your periods by 1 week then, there are chances that you may be pregnant.

During early pregnancy a HCG hormone is produces by body, which is responsible for several symptoms such as vomiting and mood swings. This HCG hormone helps in creating the placenta during the pregnancy period.

However, if your periods are regular and on date then you can go for test easily but if you have irregular periods then, take test 3 weeks after the intercourse.

Though we are in the age of advanced technology but every time we cannot be dependent on them. Home remedies for pregnancy test can be very useful if you are staying far away from the pharmacy or if you have financial problem.

The below mentioned tests are performed using regular ingredients such as sugar, salt, toothpaste etc. which are generally found in every home.

In this article we have mentioned 15 easy methods to test pregnancy at home. These methods are used in the olden days and results are reliable. The result may be either positive or negative but it is always better to test by using 2 or 3 methods.

15 Effective Homemade Pregnancy Tests:

Test – 01: Bleach Test

Bleach test is one of the oldest and trusted methods of testing pregnancy. It is recommended to be careful while using bleach and keep it away from the children and pets because it may burn the skin.

Things you may need:

  1. 1 cup bleach
  2. 1 cup urine

Steps to follow…

  • Take a container and collect your morning urine in it.
  • Then, take another large container and put 1 cup of bleach inside it.
  • Now, carefully pour urine on this bleach and wait for the response.

How to observe the results?

  • Positive: Once the process is completed if the mixture starts producing foams then the result is positive.
  • Negative: if you did not find any reaction then it is negative.

Note: Open all the windows and doors before performing this test as it produces more foam and leads to suffocation.

Test – 02: Toothpaste Test

Toothpaste is available in everyone’s home so, you can perform test easily using this method. This method is considered as safer test to conduct.

Things you may need:

  1. White tooth paste
  2. Urine

Steps to follow…

  • Take a small container and collect urine in that.
  • In the other plastic bowl you can take little amount of toothpaste in it.
  • Now, put all the urine on the toothpaste.

How to observe results?

  • Positive: If the toothpaste changes its colour by turning bluish or if it starts to produce foams then, you can consider it as positive.
  • Negative: If there is no change in the colour or texture then, the result is negative.

Test – 03: Sugar Test

Sugar is an easily available ingredient in every kitchen.

Things you may need:

  1. 2-3 teaspoons sugar
  2. Plastic bowl
  3. 1 cup urine

Steps to follow…

  • Take a plastic bowl and add sugar to it.
  • Now, pour all the urine on the sugar.

How to observe results?

  • Positive: If the sugar starts to form a bunch and it is considered as positive.
  • Negative: If you see sugar dissolving in the urine then the result is negative.

Note:

Always make use of crystal sugar for performing this test as you cannot see the formation of bunches in powdered sugar.

Test – 04: Dandelion Leaves Test

Dandelion test is one of the oldest techniques followed by women for checking pregnancy. Dandelion leaves are available in the parks, gardens etc. and the results obtained these leaves are trust worthy.

Things you may need:

  1. Handful of dandelion leaves
  2. 1 cup urine
  3. Plastic bowl

Steps to follow…

  • Take a plastic container and put all the leaves inside it.
  • Then, pour all the urine on the leaves and leave untouched for half an hour.

How to observe results?

  • Positive: If you observe blisters on the leaves then you can consider the result as positive.
  • Negative: If you do not find any reaction then the result seems to be negative.

Test – 05: Pine sol Test

Pine sol is a cleaning agent that is usually used in cleaning heavy stains such as oil and mud marks. This is widely used for pregnancy tests.

Things you may need:

  1. Pine sol
  2. 1 cup urine
  3. 1 plastic cup

Steps to follow…

  • Take a plastic cup and add pine sol to it.
  • Now, collect the urine and pour it on the pine sol.
  • Combine this properly to see the results.

How to observe results?

  • Positive: If you observe the change in colour of this mixture then the result will be positive.
  • Negative: If there is no reaction then the result is negative.

Test – 06: Mustard Powder Test

Mustard powder shows result even during the early days of pregnancy. This is one of the best methods to check pregnancy at home.

Things you may need:

  1. Hot water
  2. 1 bowl mustard powder

Steps to follow…

  • Fill the bath tub with hot water and add mustard powder to it.
  • Mix it well using long stick or hands.
  • Now, soak in this water for about 30-40 minutes.
  • Afterwards rinse thoroughly using normal water.

How to observe results?

  • Positive: If you don’t get periods even after 2-3 days then your result is positive.
  • Negative: If the result is negative then you will get periods after this soak.

Test – 07: Vinegar Test

This is another easy method to check pregnancy at home. Vinegar is generally found in all the kitchens and the results obtained are correct.

Things you may need:

  1. ½ cup white vinegar
  2. Urine
  3. Plastic bowl

Steps to follow…

  • Take a container and collect the urine in it.
  • On the other side pour vinegar in a plastic bowl and add the urine to it.
  • Then, wait for some time and observe the results.

How to observe results?

  • Positive: If there is any change in the colour of the mixture then the result is positive.
  • Negative: If there is no change in colour then it is negative.

Test – 08: Tuna Juice and Vinegar Test

Mixing tuna juice with vinegar to check for pregnancy is very reliable method.

Things you may need:

  1. 1/4th cup tuna juice
  2. 1/4th cup white vinegar
  3. 1/4th cup urine
  4. Plastic container

Steps to follow…

  • Take a plastic container and add tuna juice along with some vinegar.
  • Now, pour the collected urine and wait for the response.

How to observe results?

  • Positive: If you the mixture turning to orange or yellow then, result is positive.
  • Negative: If the colour changes to light green then, the result is negative.

Test – 09: Soap Bubble Test:

The results obtained from soap water method are not reliable but it is one of the best method to follow when you don’t have other ingredients:

Things you may need:

  1. Urine sample
  2. Soap
  3. Water

Steps to follow…

  • Collect the urine in a plastic bowl.
  • On the other side you can make lather out of bathing soap.
  • Now, add this soap water to the urine and check out the reaction.

How to observe results?

  • Positive: If this mixture starts producing foams or frothing bubbles then it is indicating positive.
  • Negative: If there is no reaction then, the result is negative.

 Test – 10: Baking Soda

Baking soda gives a trust worthy result of up to 70% accuracy. This is always available in home.

Things you may need:

  1. 2 tablespoons baking soda
  2. Urine sample
  3. 1 plastic bowl

Steps to follow…

  • Take a plastic bowl and add baking soda to it.
  • To this you can add 1 tablespoon urine.
  • Then, wait for the results.

How to observe results?

  • Positive: If it starts to produce fumes then the result is positive.
  • Negative: If there is no reaction between these ingredients then, the result is negative.

Test – 11: Wine Test

Wine test is being followed since ages and it is said that the results from wine test are reliable.

Things you may need:

  1. ½ cup wine
  2. ½ cup urine sample
  3. Plastic bowl

Steps to follow…

  • Take a plastic container and pour the wine along with some urine sample.
  • Now, mix all the ingredients thoroughly.
  • Now, leave it untouched for about 10 minutes.

How to observe results?

  • Positive: If you observe changes in the colour of this mixture then, the result is positive.
  • Negative: If you don’t find any change in the colour then, result is negative.

Test – 12: Wheat and Barley Seeds Test

This method was followed by women during the olden days when there were no pregnancy test kits to check.

Things you may need:

  1. ½ cup barley
  2. ½ cup wheat seeds

Steps to follow…

  • Take a bowl and mix barley seeds along with wheat seeds.
  • Then, add 1 cup urine to it and leave untouched for 2 -3 days.

How to observe results?

  • Positive: If you find the seeds start sprouting then, the result is positive.
  • Negative: if there is no change in seeds then, the result is negative.

Test – 13: Only Urine Test

It is best and easiest test that can be performed by all the women. But the results are not quick as other methods.

Things you may need:

  1. 1 cup urine sample
  2. A glass jar with flat surface

Steps to follow…

  • Take a cup and collect urine in that.
  • Then, slowly pour it into the jar and keep it aside for 1 whole day.

How to observe results?

  • Positive: If there a thin layer on the urine then the result is positive.
  • Negative: If there is no such layer then the result is negative.

Test – 14: Oil Test

Oil test gives you a quick and trusted result. Here you need not leave it for hours to together. Oil is essential in our daily routine and it is available in every home.

Things you may need

  1. 2-3 drops of oil
  2. ½ cup urine
  3. A small container

Steps to follow…

  • Take a small container and pour ½ cup of urine to it.
  • Now, add 2-3 drops of oil into the urine.

How to observe results?

  • Positive: If you see all the oil combine together and forms a large drop then, the result is positive.
  • Negative: If you see oil is scattered everywhere then, the result is negative.

Test – 15: Salt Test

Another accurate and economical test can be done using salt. Salt can be called as king of kitchen because it is important in every recipe so; generally found in all kitchens.

Things you may need:

  1. 3-4 tablespoons salt
  2. 1 cup urine

Steps to follow…

  • Take a container and put salt in it.
  • To this you can add urine and wait for reaction.

How to observe results?

  • Positive: If the result is positive then, this mixture turns to bluish cheesy texture.
  • Negative: If there is no change in the colour then, the result is negative.

Symptoms of pregnancy:

We have listed down few of the common symptoms that occur during pregnancy in the initial days:

  • Missed periods: This is the initial way of testing pregnancy because whenever the egg is ovulated and combines with the sperms then the periods doesn’t occur indicating the pregnancy.
  • Spotting: During initial stages you may feel the pain and some spots of blood, which can occur when the egg is attached to the uterine line.
  • Vaginal discharge: Some women may experience thick milky discharge during the pregnancy due to the thickening of the uterine walls. While some times this may occur throughout the pregnancy.
  • Breast change: In the initial days you can notice the changes in breast such as heaviness, tingling, soreness and a type of discomfort. This discomfort slowly goes away with time.
  • Fatigue: During the initial stages body goes through various changes so you may feel tired and sometimes body temperature increases.
  • Headache: Due to the changes in the body hormones you can experience heaviness in the head and sometimes may feel headache.
  • Increased urination mood swings: A lot of changes occur in the body internally, which affects our day-to-day life. During pregnancy you may lose your temper with small things and can get irritated of smaller issues.
  • Increased sensitivity to some smells: You may feel intolerant towards few smells like lavender, ACV, camphor etc.

Frequently asked questions:

1. How soon i can test for pregnancy?

Once your periods are missed and you are expecting then, it is better to wait for a week and go for test. Pregnancy tests are reliable from the initial days itself but it is always better to wait for 1 week before testing.

2. Can i get pregnant immediately after my periods?

Once you’re periods are finished the next egg ovulates again after 12-14 days. During this period there is higher number of chances of getting pregnant. However, in some cases women may get pregnant even after her periods.

3. Is white discharge a sign of ovulation?

Many women experience white discharge prior to the ovulation. This white discharge can be transparent gel like substance discharging along with urine. It gets thicker during the ovulation period and discharge slows down and stops after 3-4 days.

4. What is the best time for pregnancy test?

Pregnancy tests must be done in the morning only because the first urine of the day will be highly concentrated and it will have more amount of HCG hormone. This hormone is released during the pregnancy and is responsible for obtaining results for test.

5. What is normal temperature for a pregnant woman?

During early days of pregnancy woman may experience slight increase in the temperature compared to the regular body temperature. The increase will be just around 0.6 degree. Sometimes, you may have temperature during your periods also.

Summary:

Pregnancy is a beautiful phase in women life. They just cannot wait to go for test and confirm the news. By the above mentioned methods we have made it easier to test at your home. You can the above mentioned methods and check about your pregnancy.

If you have any queries please write to us in the comment section below. Our team will respond back as soon as possible.

Filed Under: Home Remedies, Remedies

« Previous Page
Next Page »

Footer

DIY Remedies is a participant in the Amazon Services LLC Associates Program, an affiliate advertising program designed to provide a means for sites to earn advertising fees by advertising and linking to amazon.com.

  • Home
  • Affiliate Disclosure
  • Disclaimer
  • Terms and Conditions
  • Privacy Policy
  • About Me
  • Contact Us
Copyright © 2020 · DIYRemedies.org