• Skip to primary navigation
  • Skip to main content
  • Skip to footer

DIY REMEDIES

Radiant Wellness: Empowering Your Health and Beauty

  • Home
  • Recent Articles
  • Remedies A – Z
  • DIY Smoothies
  • Reviews
  • About Me
  • Contact Us

Beauty

How to use Baking Soda for Rashes

August 18, 2016 By Sruthika Leave a Comment

How to use Baking Soda for Rashes

Skin rashes are accompanied by small bumps or other changes in the skin (like in color, texture or appearance) that makes the skin red, irritated and itchy. These rashes can occur on any part of the skin and might be distributed to a large area of the skin.

Generally, rashes on the skin will appear due to many reasons like allergies, psoriasis, acne, insect bites, excessive sweating, eczema, mites or getting contact with certain poisonous plants or using soaps, shampoos, detergents or cosmetics that doesn’t suit your skin.

Rashes might be a symptom of certain microbial infections and the use of natural remedies will provide relief from the rashes without harming your skin like over the counter creams or medicines. But remember to consult your doctor, if you didn’t get any relief from the rash or if it is growing on the skin for immediate diagnoses and treatment.

Here in this article, we are going to know all about how to cure certain skin rashes like poison ivy, eczema, chicken pox, bug bites, ringworm, hives, shingles and spider bites using baking soda.

How Does Baking Soda Works for Rashes?

Baking soda is an essential ingredient that everyone should keep it in the home due to its huge range of different applications (health, beauty, and home).

  • Baking soda bath will soothe the irritation, itching and other discomforts caused by the rash.
  • It has antibacterial and antimicrobial properties that help you in clearing the rashes formed by any microbial infections.
  • It has anti-inflammatory properties that soothe and heals the rash affected skin area by combating redness, pain, and swelling.
  • It balances the pH of the skin to get rid of pain, itching, and irritation associated with the rashes.It counteracts the acids which damage the skin and make it unhealthy.
  • It acts as a drying agent and exfoliates the skin to remove the excess moisture and dead cells on the skin’s surface and thereby help in giving quick relief from the problem.

Baking Soda for Skin Rash:

Skin rashes are breakouts of the skin that caused due to any underlying medical condition or allergies or getting contact with an irritating substance.

Baking soda balances the skin pH level to relieve you from itching. It also has an anti-inflammatory property that provides relief from the redness, irritation, and discomfort caused by skin rashes. It also dries out the rash for getting faster relief.

Steps to be followed…

  • This process eases the itching and discomfort associated with the rashes on the skin.
  • Add 1 part of baking soda to 3 parts of water in a bowl.
  • Stir it well to make it a fine paste and apply it on the rashes affected skin areas.
  • Let it sit for about few minutes and rinse it off thoroughly.
  • Continue doing the same process regularly for few days to get rid of the rashes.

Baking Soda for Skin Rash

Note:

  • This process is also used to treat baking soda for hives and baking soda for shingles.
  • Or else mix equal quantities of baking soda and water to make a fine paste. Apply it on the affected area.
  • Alternatively, mix baking soda with enough of coconut oil to make a paste and apply this on the rashes. Rinse it off after 5 – 7 minutes and repeat the same for once or twice daily. Or use vitamin E oil instead of coconut oil.

Baking Soda Bath for Heat Rash:

Heat rash or sun rash or prickly heat is generally caused due to the clogged sweat glands and trapped sweat along with bacteria. As the sweat gets blocked in the pores and from flowing out, thus creates rashes or blisters. This problem is most commonly faced by the people those who live in hot and humid climates.

Baking soda is alkaline in nature that gently cleanses and exfoliates the skin with its gritty texture to unclog the pores and removes the trapped sweat. It also dries out the rashes to get rid of it.

Steps to be followed…

  • Add 1 cup of baking soda to the bathtub which is filled with lukewarm water.
  • Stir it and soak yourself in this water for about 10 – 15 minutes.
  • Then take your normal bath and dry the skin thoroughly.
  • Apply some anti – prickly heat powder before wearing clothes to prevent those heat rashes.
  • Continue doing this baking soda bath for twice daily until you healed those heat rashes.

Note: Or else mix 2 – 3 tablespoons of baking soda in a container filled with water. Dip a clean washcloth in this mix and wring out to remove excess water. Apply this cloth as a compress on the affected skin areas. Remove the compress after 20 – 30 minutes and repeat it for 2 – 3 times daily.

Baking Soda for Poison Ivy:

Poison oak or poison ivy appears as small bumps, itchy and painful rashes that can spread to other parts if you’re scratching the affected area. It is caused due to the contact of skin with the colorless oil urushiol of the poison oak plant.

Baking soda neutralizes the acid that found in poison oak and gives relief from itchy rashes. It clears the fluid in the blisters and dries out them along with soothing the affected skin to get rid of the pain and inflammation.

Steps to be followed…

  • Add 3 parts of baking soda in 1 part of water and stir well to make a fine paste.
  • Apply this paste on the affected area and leave for few minutes till it gets dried.
  • Then wipe it off and repeat the same for 3 – 4 times daily to get rid of the problem.

Baking Soda For Poison Ivy

Note:

  • Or dissolve 2 teaspoons of baking soda in 1 quart of water and soak sterilized gauze pads in this paste. Apply it on the affected areas and rinse off after 10 – 15 minutes. This process helps to treat red, oozing blisters but don’t apply the pads near the eyes, as it causes blurred vision.
  • Alternatively, mix 3 teaspoons of baking soda in vinegar to make it a fine paste. Scrub it on the affected areas while showering. Rinse it off thoroughly and dry the skin to apply apple cider vinegar on scrubbed blisters.

Baking Soda for Eczema:

Eczema is defined as a recurring skin inflammation that caused due to dry, itchy and sensitive skin, allergies, stress, irritants, etc. will damage the skin and thus creates red, rough and raised patches on the skin.

Baking soda is a very effective remedy for treating eczema, want to know how? Go through this.

Baking Soda for Chickenpox:

Chickenpox is another form of rashes that occur on the skin due to varicella-zoster virus. These itchy rashes are contagious and turn into blisters. Most commonly affect newborn babies, pregnant women and people with the weak immune system.

Baking soda restores the natural skin’s acid-alkaline pH balance to relieve you from itching and pain associated with chickenpox and also dries out the blisters to get relief.

Steps to be followed…

  • Add 1/2 teaspoon of baking soda in 1 glass of water.
  • Stir well and use this water to have a sponge bath.
  • Concentrate more on the chickenpox affected skin areas while having a sponge bath.
  • Let the skin dry thoroughly before wearing clothes or any medicated creams.
  • Repeat the same process regularly.

Baking Soda for Rashes

Note: Mix 1/2 – 1 cup of baking soda in your bathtub filled with water. Stir well and have your bath in this water.

Baking Soda for Bug Bites:

Bug bites are very aggravating and the bite might be swollen, red, sting or itchy rashes on the skin which depends on which bug bites you. Bed bug bites make you restless nights and the most exposed body parts are the face, neck, arms, and hands for these bug bites.

Baking soda or sodium bicarbonate helps to neutralize the acidic nature or chemical reaction causing itching from the bug bites. It effectively draws out the toxins and fluids for faster healing. It also reduces the redness and swelling with its anti-inflammatory property.

Steps to be followed…

  • Add 1 teaspoon of baking soda in 3 teaspoons of water.
  • Stir well and apply this mix to the affected areas.
  • Let it sit for about 10 minutes and rinse off with water.
  • If your discomfort persists, then again apply it after 30 – 45 minutes.

Note:

  • This process is also used to treat baking soda for spider bites or insect bites.
  • Or else mix baking soda in little of witch hazel to make a paste. Apply it directly on the bite and rinse it off after few minutes.

Baking Soda for Ringworm:

Ringworm is a contagious skin infection that caused due to fungus. It causes itchy rashes and red ring-like patches on the affected skin areas.

Baking soda has antifungal and antiseptic properties that fight against the fungus causing ringworm and also acts as a proper pH balancer.

Steps to be followed…

  • Wash the ringworm affected area with warm water and dry the skin.
  • Pour some baking soda on the affected area and massage it gently for a minute or two.
  • Make sure that you have applied the baking soda on all over the affected areas.
  • Or simply apply a paste of baking soda mixed with water on the affected areas and rinse off after 15 minutes.
  • Continue doing the same process till you get rid of the problem.

Tips and Precautions:

  1. Don’t leave baking soda on the skin for a longer time as it causes dryness and irritation.
  2. Wear clean cotton clothes but not tight clothes with abrasive fabrics for preventing further pain, itching, and irritation.
  3. Expose the affected area to air, clean the rash regularly with warm or tepid water, avoid exposure to direct sunlight, don’t scratch the rash affected areas, apply baking soda regularly, etc. has to be followed to get quick relief from the rashes.
  4. Baking soda should not be applied on the broken or too irritated skin with constant scratching.
  5. For treating all your rashes, mix a little water in baking soda to make a thick paste and apply it on the affected areas.
  6. Always remember that to use baking soda for rashes till the problem is cured but not for a prolonged time why because the baking soda will alkalize the skin and may damage the skin barrier and thereby makes the skin more irritated and prone to infections.
  7. Intake of a little baking soda in 1 glass of water will also help you to get rid of the problem from inside out.
  8. If the usage of baking soda causing any further irritation or itching then immediately consult your doctor to get rid of these rashes on the skin.
  9. Never ever use baking soda which is used for cleaning purpose and be sure to use food grade baking soda for treating your health, hair and skin problems, including rashes.
  10. We can use baking soda to grab various health and beauty benefits like teeth whitener, natural exfoliator or facial scrub, mouth freshener, deodorant, antacid, skin neutralizer, reduces fatigue, aids in proper digestion and prevent digestive disorders, natural cleanser, prevent respiratory problems, etc.

Rashes occur very commonly on the skin but the usage of baking soda will help you to get rid of them quickly without doing any harm to the skin. Follow these baking soda for rashes methods and share your experience with us.

Filed Under: Remedies, Skin

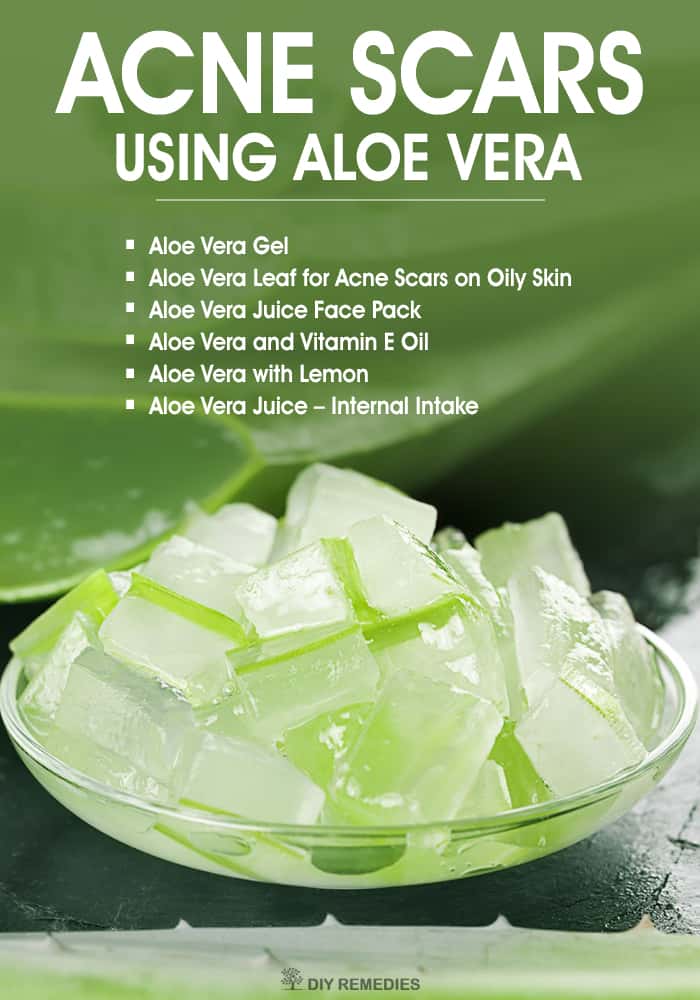
How to Clear Acne Scars using Aloe Vera

August 18, 2016 By Sruthika Leave a Comment

Acne is caused when the skin pores or hair follicles gets clogged with dirt, excess oil, and dead cells, then the bacteria will thrive out in the form of acne pimples on the skin. You can easily get rid of acne by using many natural home remedies. But when once the acne breakouts cleared from the skin then you might be left with the nasty skin issue called acne scars. These scars are deeply rooted in the skin and thus become difficult in treating them.

Aloe vera, also called as Plant of life is a very effective natural remedy for treating acne and the acne scars on the skin. Regular usage of aloe vera will significantly reduce the visibility of scars and makes you feel more confident in your skin.

Is Aloe Vera Good for Acne Scars?

Here are some of the aloe vera properties that make you understand how aloe vera works for clearing acne and acne scars on the skin.

  • It has many essential vitamins (vitamins A, B1, B2, B3, B6, B12, C & E) that helps for our blood production and mineral (like zinc, calcium, chromium, magnesium, selenium, iron, potassium, sodium, copper and manganese) that helps to heal the skin and even treats deep acne scars.
  • It is rich in amino acids that help to nourish the skin to make it softer, elastic and smooth it.
  • It has an anti-inflammatory property that helps you to get relief from the redness and inflammation of the skin.
  • It has antimicrobial, antibacterial, germicidal and antiseptic properties that protect the skin from germs and bacteria causing acne worse and hence heals acne without causing acne scars on the skin.
  • It has polysaccharides and gibberellins compounds that enhance the cell growth, rejuvenate the damaged skin cells and heals it to get relief from acne scars.
  • It has 99% of water in it that helps to hydrate the skin and makes it relaxed and smoothens. So, it keeps the skin stay moisturized and cures scars on the skin.
  • It has excellent astringent and antioxidant properties that remove the effect of free radicals on the skin, clears all impurities from the skin and reveals healthy acne scars free skin.

How to use Aloe Vera for Acne Scars:

Discover these amazing aloe vera methods for treating acne scars and makes your skin scars free and beautiful.

Method – 1: (Aloe Vera)

Aloe vera itself is more efficient in treating the scars problem, as it hydrates the skin and removes the scars quickly.

Steps to be followed…

  • Take a fresh aloe vera leaf and squeeze out its gel using a knife or spoon.
  • Apply this gel on all over the acne scars.
  • Massage gently and leave it on for few minutes.
  • After that, rinse off with water and dry the skin to apply an oil free moisturizer.
  • Repeat the application regularly until you got complete relief from acne scars.

Note: Or if you don’t have aloe vera plant at home then use pure aloe vera juice brought from any departmental stores.

Method – 2: (Aloe Vera Leaf for Acne Scars on Oily Skin)

People with oily skin are more difficult to get rid of acne scars why because the oil will clog the pores and makes it hard to get relief from the acne and thereby acne scars.

Steps to be followed…

  • The best of using fresh aloe vera is by making it into a fine paste.
  • Start the process by filling a pot with enough water.
  • Place an aloe leaf in it and boil it till the leaf become soft and squishy.
  • Remove the leaf and cool down it by running under cold water to reach room temperature.
  • Then grind the soft leaf to make it a fine paste either by using a mortar and pestle or spoon or folk.
  • Now add few drops of honey and a little of flour in aloe paste.
  • Stir well to make it a thick paste and spread this paste evenly on all over the acne scars affected skin areas.
  • Let it sit for about 15 – 20 minutes and rinse it off with cold water.
  • Repeat the same process for once or twice a week until you soothe acne and clears acne scars.

Note:

  • For treating acne scars on the dry skin, mix Shea butter and olive oil (which moistures the dry skin and heals acne scars) in aloe vera leaf paste and apply it on acne scars.
  • For treating acne scars on the sensitive skin, mix yogurt and cucumber juice (as both ingredients soothe the sensitive skin, tightens the pores and reduces the acne breakouts) in aloe vera paste. Apply it on the acne scars.
  • Or else apply the honey mixed aloe vera paste on the face as a face mask for 10 minutes and rinse it off.

Method – 3: (Aloe Vera Juice Face Pack)

In this process, aloe vera and chickpea flour help to clear excess oil, dust, and dead skin cells which in turn helps for faster healing of acne scars. Turmeric helps to lighten the acne scars and this combination provides you with acne scars free skin with an even tone.

Steps to be followed…

  • Cleanse your face with a mild aloe vera face wash to clear the dead cells and excess oil.
  • Dry the skin and add 1 teaspoon of turmeric powder and 1 tablespoon of chickpea flour in enough of aloe vera juice.
  • Stir well to make a fine thick paste and apply this paste on the face and neck as a face pack.
  • Wait for few minutes to get dried and start scrubbing your skin with your wet fingers to remove the pack.
  • Finally, rinse the face with clean water and dry the skin thoroughly.
  • Apply a light aloe vera moisturizer and do the same process regularly.

Method – 4: (Aloe Vera and Vitamin E Oil)

This face mask is very effective in healing the acne scars. Vitamin E oil rejuvenates the damaged skin and heals it quickly. Aloe vera provides essential moisture to the skin.

Steps to be followed…

  • Add 1 teaspoon of vitamin E oil with 1 – 2 tablespoon of aloe vera gel.
  • Stir well and apply this on the face and neck as a face mask.
  • But be sure to concentrate more on the acne scars (where acne is completed cured).
  • Let it sit for few minutes and wash your face with lukewarm water followed with cold water.
  • Repeat the same process regularly to shorten the clearing period of the scars or pigmentation.

Note: Alternatively, mix almond oil or almond powder (rich in vitamin E) in aloe vera gel and apply it on the scars. Leave it on for 10 – 15 minutes and scrub (for powder) or massage (for oil) the area gently with wet fingers. Rinse off.

Method – 5: (Aloe Vera with Lemon)

Lemon kills the germs, clears dead skin and lightens (or tightens) the skin but dries out the skin, so aloe vera mixed with lemon juice becomes best in treating acne scars.

Steps to be followed…

  • Add 5 – 8 drops of fresh lemon juice in 1 tablespoon of aloe vera gel.
  • Stir well and apply this on the acne scars affected skin areas.
  • Massage it gently for few minutes and leave it for another few minutes.
  • Rinse it with water and dry the skin thoroughly to apply moisturizer.
  • Continue doing the same process for twice daily.

Note: Or mix equal amounts of lemon juice, aloe vera and honey in a bowl. Apply this mix on the acne scars and allow it to sit for 2 – 3 minutes. Then massage the scars and rinse off.

Method – 6: (Aloe Vera Juice – Internal Intake)

Drinking aloe vera juice can heal acne scars from inside the body, as it works to flush out the accumulated toxins from the body and thus promotes for skin glowing.

Steps to be followed…

  • Extract aloe vera gel from a thick leaf and place it in a blender.
  • Blend it to make it a fine juice and drink it to get relief from acne scars.
  • Or if you feel hard to drink it, you can add some aloe vera gel into your favorite smoothies before blending and then drink it.

Note:

  • Start the intake of aloe juice in small quantities and then increase the dose.
  • Or you can add some fresh ginger or lemongrass to plain aloe vera juice and drink it.

Tips and Precautions:

  1. If you don’t have aloe vera at your home then choose the best product that contains real aloe vera from the whole range of products available in the market. Check the list of ingredients before buying the products.
  2. Rather than using aloe vera gel or juice, there are many lotions or creams or soaps that contain aloe vera extract for treating acne scars. You can use them regularly to get relief from the problem.
  3. Before using aloe vera for acne scars treatment, make sure to check whether it is allergic to you or not, as it belongs to garlic, onions, tulips or other plants of lilac family. So, if you’re allergic to lilac family plants then avoid using aloe vera for acne scars.
  4. Avoid drinking aloe vera gel or juice for more than 1 year, as it increases the risk of colorectal cancer.
  5. Apart from aloe vera methods, you have to follow some changes in your lifestyle and diet plan, reduce stress, don’t sleep with makeup, avoid oily or processed foods, have proper skin care hygiene, etc. to get rid of the acne and its scars on the skin.
  6. Consult your doctor if the symptoms persist.

Hope the above aloe vera methods are useful to minimize or lighten up the acne scars. Do you know any other aloe vera methods you follow? Then share your experience with us.

Filed Under: Acne, Remedies

How to get rid of Dark Circles using Lemon Juice

August 13, 2016 By Sruthika Leave a Comment

How to get rid of Dark Circles using Lemon Juice

How to get rid of dark circles using lemon juice:

Dark circles around the eyes are highly embarrassing!!

But it is quite common in every person because the skin around the eyes is very thin and delicate so, if there are any changes inside the body then, it is easily visible around the eyes.

Illness and tiredness are 2 main reasons for dark circles but apart from them there are several reasons such as age, improper sleep, pregnancy, unhealthy food, using computer for long time, skin dryness, allergies, stress, crying, tension etc. are responsible for dark circle.

Due to these reasons the veins and blood vessels gets closer to skin and leads to puffy and hyper pigmented skin below the eyes.

This spoils your entire look so; everyone wants to get rid of them as soon as possible. In this article we have mentioned how to use lemon for dark circles because lemon is rich in vitamin C and citric acid that acts as bleaching agent and lightens the skin tone.

So, let’s have a look on benefits of lemon, different methods of using lemon and tips for removing dark circles.

Benefits of lemon juice for removing dark circles:

  • It has excellent bleaching property that lightens the dark coloured skin.
  • The presence of vitamin C and citric acid is helpful in lightening the skin and also removes the dead skin cells.
  • Lemon has calcium, proteins, carbohydrates, magnesium, vitamin B etc. that improves the immune system of the body and maintains healthy skin.
  • It is capable of tightening the blood vessels and reducing the swelling by allowing the fluids to flow into body.
  • The presence of anti-bacterial and anti-septic property destroys the bacteria and keeps you away from allergies, illness etc. that are responsible for dark circles.
  • The astringent property of the lemon removes all the dirt and oil that is trapped in the skin pores. This is helpful in removing the wrinkles and making skin smooth.

Top 10 methods of using lemon to remove dark circles below your eyes:

Method 1: Lemon Juice:

Lemon juice has skin brightening property so; it is useful in removing the dark circles.

What you need:

  • 1 lemon

How to use?

  • Take a lemon and cut into two halves.
  • Extract the juice from both the halves and soak a cotton ball in it.
  • Now, apply this cotton ball on the dark circles and press them slightly.
  • Allow it to sit for about 10-15 minutes and clean it using cotton cloth.
  • For best results you can repeat the same method 2-3 times per day.

Lemon Juice for Dark Circles

Note:

  • Make sure this lemon juice should not get into eyes.
  • If you have sensitive skin then, you can dilute the lemon juice with some rose water or water.

Method 2: Tomato and lemon juice:

Tomato has lycopene that makes skin softer and helps in fading away the dark circles under eyes. It is also in removing the makeup and cleansing the skin.

Tomato is rich in vitamin C that destroys the bacteria on the skin and helps in maintaining healthy and glowing skin. So, the combination of lemon juice and tomato will remove the dark circles below your eyes.

What you need:

  • 1 teaspoon lemon juice
  • 1 teaspoon tomato juice

How to use?

  • In a small bowl add both the ingredients and mix thoroughly.
  • Now, apply this on the dark circles and massage it gently.
  • Leave it for about 15-20 minutes and then wash using cold water.
  • Pat the skin dry and apply some moisturizer.
  • For best results repeat the same process twice a day.

Other methods:

  • Take a bowl and add 1 tablespoon of lemon juice, 1-2 tablespoons of tomato juice and ½ teaspoon of turmeric powder along with 1 teaspoon of gram flour. Mix it thoroughly and apply this below the eyes. Leave it for 10 minutes and then wash using water.
  • You can take a glass of tomato juice and add 1 tablespoon of lemon juice, salt and mint leaves in it. Stir well and drink this juice to get rid of dark circles.

Method 3: Cucumber juice and lemon juice:

Cucumber has high amount of water so it provides cooling effect. It is helpful in reducing the swelling and dark skin. The chilled cucumber slices removes the puffiness below your eyes.

It also provides soothing effect to the skin under eyes and relieves stress.

What you need:

  • 1 tablespoon lemon juice
  • 1 tablespoon cucumber juice

How to use?

  • Take a bowl and combine equal quantities of lemon juice and cucumber juice.
  • Mix them well and dip a cotton ball inside this mixture.
  • Now, apply this cotton on the dark circles massage gently for couple of minutes.
  • Then, allow it to sit for about 10-15 minutes and later wash using warm water.
  • You can repeat the same process you get rid of dark circles completely.

Method 4: Mint leaves with lemon juice:

Mint leaves causes tingling sensation when applied under the eyes. This helps in increasing the blood flow to the eyes and reduces the appearance of dark circles.

Mint leaves and lemon juice together are helpful in getting rid of dark circles.

What you need:

  • ½ cup fresh mint leaves
  • 3-4 drops of lemon juice

How to use?

  • Take a blender and add ½ cup of fresh mint leaves into it.
    Run the blender to make paste of it and add 3-4 drops of lemon to it.
  • Mix it well and apply on the dark circles using cotton ball.
  • Leave it for about 15-20 minutes and wash it off using water.
  • Pat dry the skin and repeat the same process two times per day.

Method 5: Coconut with lemon water:

Coconut is the best moisturizing agent that provides soothing and calming effect to the skin. It is helpful in lightening the dark skin and dark circles under eyes. It also helps in preventing wrinkles and lines that are visible near the eyes.

Combination of coconut and lemon is perfect way to remove the dark circles and provide moisturization to the skin.

What you need?

  • Take a bowl and add 1 tablespoon of each coconut, lemon juice and fresh cream.
  • Mix well and add 2-3 teaspoons of grated cucumber to it along with 3 teaspoons of china clay.
  • Stir well and make a paste of it. Apply this paste on the dark circles and leave for about 15-20 minutes.
  • Make sure this mixture should not come in contact with inner eye.
  • Later, you can rinse it off using water.
  • For better results you can repeat the process regularly.

Other methods:

  • You can mix olive oil or almond oil with lemon juice and apply it on the dark circles using cotton ball. Leave it for about 30 minutes or overnight and wash it using water.

Method 6: Potato and lemon juice:

Potato has bleaching agent that lightens the dark skin and removes the dark circles. It is also useful in tightening the skin and removal of dead skin cells. So, when you add lemon juice and potato juice, the results obtained are highly effective.

What you need?

  • 1 tablespoon potato juice
  • 1 tablespoon lemon juice

How to use?

  • Potato juice: Take a potato and peel it. Make small chunks of this potato and blend it to make paste. Pour this paste in the cloth and remove the juice from it.
  • Take a bowl and add 1 tablespoon of potato juice along with 1 tablespoon of lemon juice.
  • Apply it all over the dark circles using cotton ball.
  • Let it sit for about 15-20 minutes and then, wash using water.
  • For best results you can use it once in a day.

Method 7: Honey and Lemon Juice:

Honey is a natural skin lightener that can be used to remove the dark circles under the eyes. So, it can be mixed with lemon juice and used for removing of the dark circles.

What you need:

  • 1 teaspoon lemon juice
  • ½ teaspoon raw honey

How to use?

  • Take a bowl and add 1 teaspoon of lemon juice along with ½ teaspoon of honey to it.
  • Mix it thoroughly and apply it on the dark circles.
  • Leave for about 15-20 minutes and rinse using cold water.
  • Then, you can dry the skin.
  • For best results you can repeat the same process regularly.

Method 8: Egg white and Lemon juice:

Egg white reduces the swelling of the skin and is helpful in lightening the skin. So, egg white and lemon juice together can be best remedy to get rid of dark circles.

What you need:

  • 1 egg
  • ½ teaspoon lemon juice

How to use?

  • Take a bowl and add 1 egg white into ait and whisk properly.
  • To that you can add ½ teaspoon of lemon juice.
  • Now, apply it on the dark circles using cotton ball and place the cotton ball over it.
  • Allow it to sit for about 15-20 minutes.
  • Remove the cotton and rinse well using water.

Method 9: Baking soda and Lemon Juice:

Baking soda has bleaching property that exfoliates the skin and removes the dead skin cells. It removes the spots and patches and makes skin look brighter.

What you need?

  • 1 teaspoon baking soda
  • 4-5 drops of lemon juice

How to use?

  • Take a bowl and add 1 teaspoon of baking soda along with 4-5 drops of lemon juice.
  • Mix them thoroughly and apply it on the skin using a cotton ball.
  • Leave it for about 3-5 minutes and then rinse using water.

Method 10: Apple cider vinegar and lemon juice:

Apple cider vinegar is beneficial for skin lightening and it exfoliates the skin by removing the dirt and dead skin cells from the skin pores. So, lemon juice and apple cider vinegar together can be beneficial in removing the dark circles.

What you need:

  • ½ teaspoon apple cider vinegar
  • ½ teaspoon lemon juice
  • 1 tablespoon water

How to use?

  • Take a bowl and mix all the ingredients in it.
  • Apply it on the dark circles using a cotton ball.
  • Leave it for about 10 minutes and rinse off using water.

Tips and precautions for removal of dark circles:

  1. Make sure that the above mentioned remedies are only for external application so, apply them carefully around the eyes and not letting it go inside the eye.
  2. If you are feeling any kind of itching or irritation after applying these natural remedies then, wash it off using water and remove it completely.
  3. Drinking lemon juice daily in the morning is also helpful in removing the toxins from the body and making skin clear.
  4. Try to use fresh lemon juice instead of using stored or packed lemon extract, in order to get effective results.
  5. Wash your face properly using water and mild soap, before applying the above mentioned masks
  6. You can also add vitamin E oil from the capsules to lemon juice method for quick results.
  7. Along with external methods it is important to drink plenty of water, consume vitamin C in your diet, have sound sleep, exercise properly and reduce stress to get rid of dark circles.
  8. If the dark circles are more and you are not finding any difference after using the above methods then, consult dermatologist for proper diagnosis and treatment.
  9. Whenever you are going out in sun you must use sunscreen lotion and sunglasses compulsory to prevent occurrence of dark circles.
  10. Avoid smoking and drinking alcohol, which are main reasons for dark circles.
  11. Try to keep a slice of lemon on your eyes and rest for 10-15 minutes to get rid of dark circles easily.

Frequently asked questions:

Is vitamin C serum helpful for getting rid of dark circles?

Vitamin C helps in brightening the skin, removing the dead skin cells, tightening and hydrating the skin.  So, you can use vitamin C serum to remove the dark circles below the eyes.

Can i get rid of dark circles by increasing sleeping hours?

Dark circles under the eyes may appear due to various reasons including sleep. Waking up late night for work or watching TV affects eyes and leads to dark skin below the eyes. But rather than increasing the sleeping time it is important to have sound sleep for 6-7 hours.

However, there are many other reasons that are responsible for dark circles.

Can i use aloevera and lemon juice for dark circles?

Yes, you can combine 1 teaspoon of aloevera gel along with 1 teaspoon of lemon juice and apply it on the dark circles using cotton ball. Aloevera provides nourishment to your skin and removes the dark circles under the eyes.

Which vitamins are best to get rid of dark circles?

Vitamin C and vitamin K are best for the removal of dark circles under the eyes. So, you can include broccoli, spinach, lemon, sprouts and leafy vegetables in your daily diet and remove dark circles quickly.

Few words to note….

Dark circles are common in every person irrespective of the age. But they are highly annoying and make you feel low confident. So, in the above article we have mentioned how to get rid of dark circles under the eyes using lemon juice.

If you have any queries you can kindly write to us in the comment section. Our team of experts will clarify them as soon as possible.

Filed Under: Dark Circles, Remedies

How to Tan with Coconut Oil

August 13, 2016 By Sruthika Leave a Comment

How to Tan with Coconut Oil

Summer! The sunny summer days are liked by most of the people who are living in cold countries (like Europe, America, and Australia) why because it is the perfect time to get a tan on the skin. So, here comes the huge demand for perfect tanning oil.

Most of the people desire to have a glossy and well tanned (bronzed) skin but the problem appears here is ‘how to protect the skin from the harmful sun’s UV (UVA & UVB) rays.

Coming to sunscreens for a tan, as most of the sunscreens and sunblocks contain toxic chemicals like fragrances, alcohols, solvents, parabens and petroleum oils that irritate and damage the skin, especially if you’re having sensitive skin when exposed to sunlight.

Even the branded ones are also performing poorly in protecting your skin against sun and melanoma. So, instead of using those harsh toxic sunscreens, try using natural coconut oil to tan your skin by sunbathing and protect your skin from harmful sun rays.

Is Coconut Oil Good for Tanning?

Here are some of the benefits which you get from coconut oil and thus make it as the best alternative to your sunscreens.

Protects Skin:

Your skin will lose the moisture and starts to crack and peel while it is burned by the sun. But if you apply coconut oil which has stable saturated fats that form a protective layer on the skin to reduce the loss of moisture. So, it retains the skin’s moisture, results in less peeling or drying and thus prevents your skin from being burned or cracked. It gives you a nice suntan but not sunburn.

Getting Faster Tan in Less Time under Sun:

Coconut oil quickly activates the melanin under the skin to create the tanned look in a shorter time. So, no need to spend much time in the sun, as you do when you apply sunscreen or sunblock. Tanning slowly is better for the skin and health but don’t spend 2 – 3 hours in the sun, as it results in getting those UV rays into the skin. Apply coconut oil to the skin and spend 20 minutes in the sun will provide a darker and healthier bronze. It lasts longer on the shelf without going to rancid or expires like regular lotions and sunscreens.

Good Absorption of Natural Vitamin D:

The vitamin D is essential for immune boosting (disease protection), healthy skin, improving mental & emotional health, bone growth, and development. Most of the sunscreens and sunblocks will block the skin’s ability to absorb the natural vitamin D. This sun vitamin is essential for treating many skin and health problems like eczema. But the usage of coconut oil for tanning will allow the skin to absorb this natural D vitamin from those sun rays without harming the skin from UV rays.

Nourish Your Skin:

Besides providing a perfect bronze tan, this oil helps to nourish the skin, protects it from infections and makes it smooth and shiny. Coconut tanning oil has medium chain fatty acids like capric acid, lauric acid and caprylic acid along with vitamin E that provides essential nourishment to the skin.

Soothes and Conditions your Skin:

This tanning oil soothes the skin without causing any sunburn and also heals the skin from any possible inflammations that result from strong sun, allergenic particles, dust or environmental factors. It has an antioxidant property that protects the skin by preventing burning or oxidative damage which promotes skin cancer. It forms a layer (or barrier) on the skin that reflects the UV rays attacking your skin.
Best Natural Home Remedies for Sun Tan

Fights Infection:

Whenever you’re spending hours by lying on a sea beach or an open ground then your skin gets exposed to various germs and microbes in those surroundings. But coconut oil with its antimicrobial, antibacterial and antifungal properties that protect your skin from these germs and harmful elements.

Don’t Have Harmful Chemicals:

It is natural oil that is free from toxic chemicals, smells great, cost affordable, easy to carry and protects your skin effectively from sun. It also contains SPF that protects the skin and even good to apply for dry or sensitive skin people.

How to use Coconut Oil for Tanning:

From the above information, you came to know that coconut oil is perfect for getting a bronze tan on your skin. Now, we are going to know how we use coconut oil for tanning which is light, non-sticky and long lasting.

Method – 1: (Coconut Oil)

  • Apply melted coconut oil on all over the body like you’re applying a sunscreen and sun tanning lotion.
  • After thorough application, enjoy your sun rays in a beach or pool.
  • Reapply coconut oil for every 10 – 15 minutes.
  • Don’t stay in the direct sun for longer than 20 minutes at a time but take some breaks.
  • Spending 15 – 20 minutes in the sun per day is all essential to get a deep brown tan and to soak up the adequate amount of vitamin D into the body.

Method – 2: (Coconut Dark Tanning Oil)

  • Mix 2 teaspoons each of walnut oil, avocado oil and sesame oil, 5 – 10 drops each of coconut essential oil and vanilla essential oil in 1/4 cup of unrefined virgin coconut oil.
  • Stir well and pour this oil mix in an airtight dark-colored glass container.
  • Store the container and use it as your sunscreen while you go out for getting a perfect tan.

Note: Or mix 2 teaspoons of walnut oil and 1/4 cup of virgin coconut oil in 1/2 cup of brewed green tea. Store in a dark airtight container and use it regularly.

Method – 3: (Homemade Coconut Oil Tanning Lotion)

In this process, coconut oil and lanolin oil acts as an emollient that adds moisture to the skin to prevent flaking and gives long lasting tan. Black tea acts as a natural dye that adds color to the skin and has antioxidants that fight against toxins which rise after tanning.

  • Boil 3/4 cup of water and pour it in a mug.
  • Place 3 black tea bags in that mug and let it brew for few minutes.
  • Then add 1/4 cup each of coconut oil, lanolin oil and brewed black tea in a blender.
  • Blend it well by adding remaining 1/2 cup of black tea.
  • Stir well and store it in an airtight container.
  • Apply this lotion while you step out into the sun for tanning.

Method – 4: (Coconut Oil and Carrot Juice)

Carrot juice helps to improve the skin tone and this combination will help you in getting tan without damaging the skin.

  • Apply 2 cups of carrot juice on the sun-exposed areas of the skin by using a cotton ball.
  • Leave it for a few minutes till it dries completely.
  • Then apply a liberal amount of melted coconut oil all over the body.
  • Now go out in the sun to grab the bronzed skin with proper tanning.
  • Make sure to reapply coconut oil for every 15 minutes for best and quick results.
  • Never ever stay in direct sunlight for more than 20 minutes, take some short breaks.
  • Continue spending in the sun for at least 20 – 30 minutes to get a perfect deep brown tan and to grab vitamin D in the body.

Method – 5: (Coconut Oil and Iodine for Tanning)

Iodine mixed with coconut oil helps a lot in tanning your skin faster. So, follow this remedy to get a perfect tan on the body without any side effects.

  • Pour 5 drops of iodine in 2 cups of coconut oil and stir well.
  • Apply this mix on the sun exposed skin areas.
  • Reapply this oil mix for every 15 minutes and make sure to take short breaks.
  • Do this process to grab the right amount of sun’s vitamin to the body.

Method – 6: (Coconut Oil with Olive Oil)

Both olive oil and coconut oil helps to nourish the skin deeply and thereby tans your skin fast.

  • Pour 2 cups each of olive oil and coconut oil in a saucepan.
  • Warm this oil mix gently and then pour this into a glass bowl.
  • Let it sit for a few minutes to get cool and apply it liberally on all over the exposed skin.
  • Then go for a soak in the sun but remember to reapply the mix for every 10 minutes.

Tips and Precautions:

  1. Although coconut oil doesn’t protect your skin 100% from those sun rays, so you should not stay out for too long in the sun.
  2. Always use organic, unrefined virgin coconut oil for any skin problems or tanning.
  3. Regular usage of coconut oil will not only give a tanned skin but also provides healthy and shiny skin along with protecting the skin from scorching sunlight, wrinkles, and infection.
  4. Some people use pure coconut oil or coconut oil mixed with certain herbs or essential oils or vitamins or other carrier oils and use it in tanning outside or tanning beds.
  5. Or mix some pure coconut oil with a waterproof sunscreen that has an SPF of 30 or higher and then apply it on the skin before you step out in the sun. Also, for best results, exfoliate your skin in the shower to remove dead skin and to allow the skin to tan evenly and quickly.
  6. Before starting this tanning process, make sure to exfoliate the skin in the shower by using a loofah brush to remove dead cells and thereby to allow the skin for perfect and even tanning.
  7. Drink plenty of water while spending on the sun for a perfect tan.
  8. If you’re allergic to any ingredients used in the above-mentioned methods then discontinue the usage and consult your doctor for treatment.

Did you get a dark bronze skin tan after using coconut oil? Let me know by sharing your experience.

Filed Under: Remedies, Skin

How to Get Rid of Acne Scars using Turmeric

August 9, 2016 By Sruthika Leave a Comment

Acne is an embarrassing skin condition that is caused when the skin pores get clogged with bacteria, dust, dead cells and other impurities. However, there are many home remedies for acne but the main thing here is that it leaves behind scars when once it gets healed.

When the damage of hair follicles or skin pores (due to acne) caused near the skin’s surface then it can healed without forming scars, but if that extends to dermis layers and destroys the healthy skin tissues then it forms stubborn acne scars on the skin.

If these scars are left untreated then there is a chance of acne to recur again in that place, as bacteria didn’t go away completely. These ugly scars will remind you that you’ve suffered from acne / pimples at that place.

Fortunately, there is a natural and effective home remedy that used widely to reduce scars without the usage of expensive chemical creams on the skin. That’s none other than turmeric. Turmeric is one such an ingredient that widely used to treat acne and acne scars

Before going to know how to use it, have a look on why it works.

  • Turmeric contains a compound called curcumin which exhibits an antioxidant and anti-inflammatory property that prevents the effect of free radicals on the skin and reduces the excess production of melanin and thus replaces the damaged skin with glowing skin.
  • It has an antibacterial property that helps to cure acne without forming scars on the skin.
  • It has antiseptic and soothing properties that soothe the skin to remove the scars without any pain or irritation.
    It penetrates deep into the skin layers to prevent the scars from inside out.
  • It is very effective in removing the dark spots, uneven skin patches, and acne scars to make your skin brighter and rejuvenated.

How to use Turmeric for Acne Scars:

Discover these 5 amazing turmeric methods for treating acne scars. All you have to do is to follow these methods regularly without any interruption.

Method – 1: (Turmeric Powder with Mint Juice)

Both turmeric and mint have antioxidant property that helps you to get rid of the acne scars. It also purifies the blood to prevent its recurrence.

Steps to be followed…

  • Add enough of mint juice in 1 tablespoon of turmeric powder.
  • Stir well to make a fine paste and apply it on the acne scars affected skin areas.
  • Leave it on for about 20 – 30 minutes and rinse it off with warm water.
  • Dry the skin and repeat the same process regularly until you cleared these scars on the skin.

Method – 2: (Turmeric Powder with Lemon Juice and Sandalwood Powder)

Lemon has vitamin C and skin lightening property that helps for the production of collagen fiber and reduces the appearance of scars and other marks. Sandalwood powder soothes the skin and lightens scars. This process kills the bacteria inside the skin and makes your skin scar free.

Steps to be followed…

  • Add 1 teaspoon of turmeric powder in 1 tablespoon each of fresh lemon juice and sandalwood powder in a bowl.
  • Stir well to make a fine paste and apply it on the scars affected skin areas.
  • Massage it gently for a minute or two.
  • Let it sit for 30 – 35 minutes and then wash the applied area with cool water.
  • Pat the skin dry and continue doing the same process regularly till you get complete relief from acne scars.

Note: Alternatively, mix 1/2 teaspoon each of turmeric powder and sandalwood powder in 1 tablespoon of rose water (or water or curd) to make a fine paste. Apply it on the scars and wash off after 20 minutes with water.

Method – 3: (Turmeric with Honey)

Honey has antioxidant property and contains many essential nutrients that repair the damaged skin quickly.

Steps to be followed…

  • Add 1 teaspoon of organic turmeric powder in 1 tablespoon of raw honey.
  • Stir well and spread this paste on the pimple scars affected skin areas.
  • Wait for 15 – 20 minutes and start massaging the skin with wet fingers for about 3 minutes.
  • This process will exfoliate the skin to remove dirt and dead skin cells.
  • Finally, wash it with cool water and dry the skin thoroughly.
  • Do the same process daily to get rid of these scars.

Turmeric with Honey for ACNE

Note:

  • Or you can also mix yogurt (or) milk in turmeric – honey mix before using.
  • Alternatively, prepare a turmeric mask by mixing 1 teaspoon of turmeric in water along with some honey and gram flour to make it a fine paste. Spread it on all over the face and neck as a mask and rinse off after it gets dried.

Method – 4: (Turmeric with Coconut Oil)

Turmeric and coconut oil have antioxidant property that prevents free radicals and thus supports the production of collagen to improve the skin’s elasticity and finally makes it smooth and scars free.

Steps to be followed…

  • Add 1 teaspoon of turmeric powder in 1 tablespoon of organic coconut oil.
  • Stir well and apply it on the pimples scars.
  • Let it sit for about 15 – 20 minutes and start scrubbing it gently with your wet fingers for 5 minutes.
  • Rinse off with warm water followed by cool water.
  • Dry the skin and repeat it daily.

Turmeric with Coconut Oil for ACNE

Note: Replace coconut oil with extra virgin olive oil or almond oil for treating acne scars.

Method – 5: (Turmeric with Aloe Vera Gel)

Turmeric and aloe vera have a natural antiseptic property that repairs the irritated skin, soothe the painful acne and lightens the scars.

Steps to be followed…

  • Mix a pinch of turmeric powder in 1 tablespoon of aloe vera gel.
  • Apply it on the face and leave it on for about 10 – 15 minutes.
  • Then use your wet fingers to massage gently for 5 minutes and rinse off.
  • Repeat it regularly to get rid of the acne scars.

Do’s and Don’ts:

  1. Drink plenty of water, exercise regularly, scrub your skin to unclog the pores, avoid oily or high-calorie foods, reduce your stress levels, remove makeup while going to sleep, etc. will help you to get complete relief from skin problems that includes acne scars.
  2. Don’t use more of turmeric powder than the recommended quantity, as it stains the skin and fabrics. Also, it’s best to do some skin patch test to know whether it is allergic to your skin or not and then follow it.
  3. Avoid applying turmeric in and around the eyes that it should not come into contact with eyebrows and eyelashes.
    The yellowish tinge on the skin can be removed by using a cotton ball dipped in the facial toner.
  4. Make sure to consult your health care provider while using turmeric supplements for treating acne scars and dark pigmentation.

Hope this article will help you in reducing your acne scars and make your skin glow with an even tone. Feel free to share your queries or suggestions with us in the below comments box.

Filed Under: Acne, Remedies

How to Remove Warts using Tea Tree Oil

August 8, 2016 By Sruthika Leave a Comment

Warts are small skin growths that are caused due to human papilloma virus (HPV), which affects the person’s hands, feet or genitals. Generally, these are not painful or harmful but can cause unsightly and embarrassing. These are somewhat contagious and enters easily through small cuts or break in the skin and also if left untreated it might re-occur quickly.

However, there are many ways of getting rid of warts in which tea tree oil is one best way to remove warts effectively. Tea tree essential oil is derived from the leaves of melaleuca alternifolia, native to Australia. It should be applied topically but not be taken internally, as it is toxic and leads to many harmful side effects.

For you to believe, here we are providing some of the tea tree oil properties to know how do it works for warts removal.

  • It has terpinen – 4 – ol that exhibits antibacterial, antiviral and antifungal properties to fight against the virus causing warts and thus eliminates it from the skin.
  • It has an anti-inflammatory property that soothes the skin and reduces the irritation or itching caused by warts on the skin.
  • It penetrates deep into the skin and cures the problem from inside out.

How to use Tea Tree Oil for Warts:

Discover these 4 amazing tea tree oil methods for curing your warts. All you have to do is to follow them regularly without any interruption.

Method – 1: (Tea Tree Oil)

Tea tree oil is used alone for giving an effective relief from warts and it is an easy process but should not be used by the sensitive skin people. It is used to cure all types of warts on the skin.

Steps to be followed…

  • Clean and dry the wart affected skin areas.
  • Apply one drop of pure undiluted tea tree oil on the wart.
  • Place a bandage over it and leave it on for at least 8 hours or overnight.
  • After that, remove the bandage and wash the area and dry it.
  • Use a fresh bandage on every night and repeat the same process daily until warts disappears completely from the skin.

Note:

  • Or you can also pour tea tree oil on the pad of the bandage and apply it on the wart.
  • For treating genital warts, simply dab a cotton swab in tea tree oil and apply it gently on the warts for once daily.

Method – 2: (Tea Tree Oil Compress)

Tea tree oil compress is another easy and effective method widely used to treat warts (especially plantar warts).

Steps to be followed…

  • Pour 2 – 4 drops of tea tree oil on the affected areas.
  • Then place a slice of garlic or banana peel over it.
  • Secure it with tape and let it sit for few hours to overnight.
  • Repeat the same process regularly at night before bedtime for up to 3 weeks to get rid of warts completely on the skin.

Method – 3: (Tea Tree Oil with Other Essential Oils and Carrier Oil)

Tea tree oil when mixed with other essential oils will give a quick result of getting rid of warts now and then.

Steps to be followed…

  • Add 2 drops each of tea tree oil, manuka oil, lemongrass oil, peppermint oil and eucalyptus oil in 1 tablespoons of desired carrier oil.
  • Stir well and apply it on the wart 2 – 3 times daily using a cotton ball.
  • Secure it tightly with a bandage and leave it on for few minutes to few hours.
  • Continue doing the same process regularly until warts has removed completely from the skin.

Note:

  • Or use this oil blend prepared by mixing 2 drops each of clove oil, tea tree oil, lemongrass oil and oregano oil in 1 tablespoon of carrier oil and apply it on warts affected skin areas using a cotton swab. Cover it with a cotton ball and wrap a piece of fabric or a bandage tightly.
  • Alternatively, mix 6 drops of tea tree oil and lavender oil in 1 tablespoon of organic coconut oil. Stir well and use this mix as after warts skin renewing blend that helps to heal the skin and makes no more signs of warts appear.
  • Or simply mix few drops of tea tree oil in 1 teaspoon of carrier oil and apply it on warts infected skin areas regularly.

Method – 4: (Tea Tree Oil Bath)

Depending upon the place where these warts affected on the skin, you need to take a tea tree oil bath. It is used to treat warts that are located from top to bottom, including genital warts and hard to reach areas.

Steps to be followed…

  • Run warm water in your bathtub and add few drops of tea tree oil to this water.
  • Stir well and soak yourself for at least 20 – 30 minutes.
  • Then take your regular bath and dry your skin thoroughly.
  • Repeat the bath regularly for 2 – 3 times a day until you get complete wart removal from the skin.

Tips and Precautions:

  1. Always use 100% pure tea tree oil which is not mixed with other oils for treating any health or skin problems.
  2. For dry and sensitive skin people, pure tea tree oil should be used after dilution to avoid irritation, pain, and itching. Dilute tea tree oil with any carrier oil or aloe vera gel or vitamin E oil and also apply Vaseline around warts to protect the healthy skin.
  3. Make sure to consult your doctor if you didn’t find any relief from the wart removal after using tea tree oil for 4 – 5 days or if the symptoms persist. Also, discuss with your doctor before using tea tree oil as your home remedy for warts.
  4. Avoid any contact of tea tree oil with eyes, nose or mouth, as it results in some side effects. Also, pregnant or nursing women and children above 7 years should not use tea tree oil for warts.
  5. Make sure to dispose the used cotton swab to avoid the spread of this infection to other areas.

Remove your warts using this tea tree oil and share your experience with us.

Filed Under: Remedies, Skin

« Previous Page
Next Page »

Footer

DIY Remedies is a participant in the Amazon Services LLC Associates Program, an affiliate advertising program designed to provide a means for sites to earn advertising fees by advertising and linking to amazon.com.

  • Home
  • Affiliate Disclosure
  • Disclaimer
  • Terms and Conditions
  • Privacy Policy
  • About Me
  • Contact Us
Copyright © 2020 · DIYRemedies.org